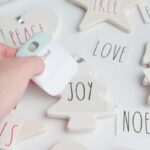
Easy DIY Rae Dunn Ornaments with Cricut
These Easy DIY Rae Dunn Ornaments are made using a Cricut and they make great Christmas gifts.
Ingredients
- 3 White Ceramic Ornaments
- Permanent vinyl color of your choice
- Transfer Paper
- Thin ribbon or string of your choice
- Brown Craft Box
- Crinkle Paper
Instructions
-
Start off by downloading the Rae Dunn inspired font for free and importing it into your machines program. You can find it at these two font websites. https://www.dafont.com/the-skinny.font or https://www.dafont.com/the-skinny.font. The second font (Cami Rae) will be used for this project.

-
Next open your machines design program. Once the font is downloaded begin to type out your words. For this project you will want to stick to shorter words (3-5 letters) to fit across the ornaments. Adjust the size of your text but clicking edit, locking the dimensions and typing in the height to 1” for all letters. The width will automatically adjust and vary based on the number the word chosen and number of letters.

-
Next, adjust your machines setting or material dial to vinyl. Load the permanent vinyl to your machine on the blue light grip mat and hit “go”. After the cut is complete, peel from the mat. Cut off the extra vinyl that was not cut and store for later use. Begin to pull the negative vinyl off and away from the letters using your weeding tool.

-
Now that the weeding is complete, cut off a piece of transfer paper the size of your cut vinyl. This will be done to help get your vinyl off the vinyls plastic backing and onto your projects surface. Lay the transfer paper on top of the cut vinyl. Use a scrapper tool or old gift card and run with pressure over the whole design with transfer paper.

-
Turn the entire design facing downwards and begin gentle pulling the vinyls plastic backing off and away from the transfer paper. Starting at a corner and rolling it away slowly while applying pressure is best.

-
When the vinyl has been successfully transferred you will be able to see the through the transfer paper with vinyl attached. Next, lay the transfer with vinyl lightly on top of your ornament. Do not apply pressure or smooth down design until you are 100% happy with the location. If happy with the location begin to apply pressure and smooth over the design using again a scrapper tool.

-
Once enough pressure had been applied slowly remove the transfer paper by starting at a corner and very carefully and slowly rolling it away and off the ornament. The vinyl will remain on your project.

-
Lastly cut off the string that comes with the ornament and add a thin ribbon of your choice for hanging.

-
Add some brown crinkle paper to a brown craft box, arrange your ornaments and you’re done. Give as a gift just like the authentic Rae Dunn ornaments.

Recipe Notes
*This font is rather thin. Be careful when removing and apply and use your fingers to help it along at times.