Learn how to make a cool tie dye shirt with these easy steps! Turn your old shirts into something new and trendy! You will have so much fun doing different kinds of designs as well!

Table of Contents
WHAT IS TIE DYE?
Before learning how to make a cool tie dye shirt, let's understand what tie dye is. Tie dye is intently connected with the late 1950s and 1960s in the United States — Woodstock, the Grateful Dead, psychedelia. And with childhood craft projects for those who grew up in the following decades.
However, it has a considerably longer history. Many societies around the world including India, China, Indonesia, and Nigeria, to mention a few, have used tie dye for a lot of years already, resulting in culturally specific fashions that are far beyond just twists of different colors.
Tie dyeing is a hand dyeing technique that involves combining a large number of little layers of fabric and binding them together firmly with thread before putting the cloth inside a dye solution. The dye doesn't get through the knotted parts.
The fabric is untied after it is dried up to expose uneven circles, spots, and stripes. Repeated tying and dipping in multiple colors can result in multicolored patterns. This manual approach, which is popular in India and Indonesia, has also been developed for use with machines.
There are also different types of tie dye, here are some examples:
- Traditional
The first is the most typical style of tie-dye, which features vibrant colors and patterns. This look became popular in the 1960s and is still fashionable to this day. A plain white shirt is tied and then colored with one or more variations of liquid dye in this form of tie dye.
- Ice Dye
Ice dying is identical to the traditional tie dye, however, the procedure is done a bit differently. A white or light-colored cloth is tied and fixed with elastic bands at the start. The clothing is then covered in ice cubes and colored powdered dye is dusted on top. The color specks will dissolve and coat the fabric as the ice melts. This technique of tie dye can produce some striking natural patterns.
- Bleach Tie Dye
These past few years, bleach tie dye, also known as reverse tie dye, has really become trending. Bleach tie dye begins with a black or dark-colored garment that is knotted and then bleached to lighten it. The bleach illuminates the visible fabric's color, resulting in a tie dye effect.
WHAT CAN I TIE DYE?
Cotton shirts are, without a doubt is the most common ones to tie dye, but that's just the start! Everything from socks and caps to sweat pants and even denim jackets can be tie dyed. Just be sure to check that the dye matches the cloth.
That is, if your cloth is made of cotton, you must use a dye mix that is made for cotton fabric. Luckily, the majority of tie dye packs are made for cotton. However, synthetic fabrics, all in all, do not color well. Here is a list of things and clothing that you can tie dye:
- Table Cloth
Pimp a plain white table cloth into a trendy tie-dyed one. You can also do it with table runners.
- Towel
You can tie dye any type of towel – hand towels, face towels, beach towels, whichever you want. Cover stained towels with some cool colors.
- Blanket
Relax in style with a tie dyed blanket. Whether it is a baby blanket, picnic blanket, or any type of blanket, it can be tie dyed. And it will surely look amazing!
- Socks
Yes, even socks! Look for old socks that you can turn into something new with just some tie dye!
- Bed Linen
Get some beauty sleep in a beautifully colored bedding made just for you! For pleasant dreams in vibrant color, tie dye sheets, along with the pillow cases, and even your entire bed set. You now have even more excuses to grab snoozes during the day.
- Curtain
Tie dye curtains will add some more flair to your sight! Personalize in shades that fit your home for a simple way to light up any part of the house, even though it's dark out.
- Sneaker Shoes
If you don't have a pair of rockin' tie dye kicks, now is the time to make one! Customize it to any design and color you want. Everyone is going to be jealous and would want one!
- Tote Bag
Carry a simple to create tote with a fantastic tie dye design to the beach, grocery, or the mall in perfect style.
- Table Napkin
With a side of tie dye, enjoy your favorite summer dishes! Tie-dye table napkins are a wonderful way to add a unique personal touch when feasting with friends and family. They're perfect for park picnics, backyard brunches, and every meal in between.
- Accessories
Splash some color into your look by tie dying some accessories! A couple of ideas for you are – scrunchies, face masks, cloth bracelets, headbands, and bandanas. You will surely look cool with some tie dyed accessories.
There is so much you can tie dye, as long as it is the right fabric! You will learn how to make cool tie dye shirts and more by the end of this article.

HOW TO MAKE A COOL TIE DYE SHIRT: STEP BY STEP INSTRUCTIONS
It is now time to learn how to make a cool tie dye shirt. Here is a step by step instruction on what you are going to do, follow for the best results!
STEP ONE: GATHER SUPPLIES
Before anything else, have everything prepared and ready. Here is a list of things you will need to tie dye:
- Clothing or Fabric – be sure to check the material of the clothing you want to tie dye.
- Dye – this will depend on the type of fabric you have. There are dyes available for specific types.
- Workspace – since this is a messy project, you are going to need to fix up a workspace. It is up to you if you want to do it indoors or outdoors.
- Plastic Container – find a container that will fit the item you will be tie dying. A substitute for a plastic container is a bucket.
- Water – you will need lots of cold water to rinse your tie dyed item. This can be done in the sink or with a hose. Just keep in mind when you are rinsing it in the sink if it's plastic it is going to stain. You can wash it in the sink as long as it isn't made of plastic.
- Rubber Bands – this will be used to tie down the fabric. It is best to use big and strong ones so they won't break.
- Rubber Gloves – this will protect and prevent your hands from getting stained.
Once you have everything needed, you can start making your cool tie dye shirt!

STEP TWO: PREPARE DYE AND FABRIC
Grab your dye, and if needed, prepare the mixture according to its instructions. There are dyes that only need some water added to them. After that, prewash all new clothing items to remove any substances that may hinder the dye from absorbing. Fabrics or clothes intended for upcycling do not need to be pre-washed; they should only be damp.
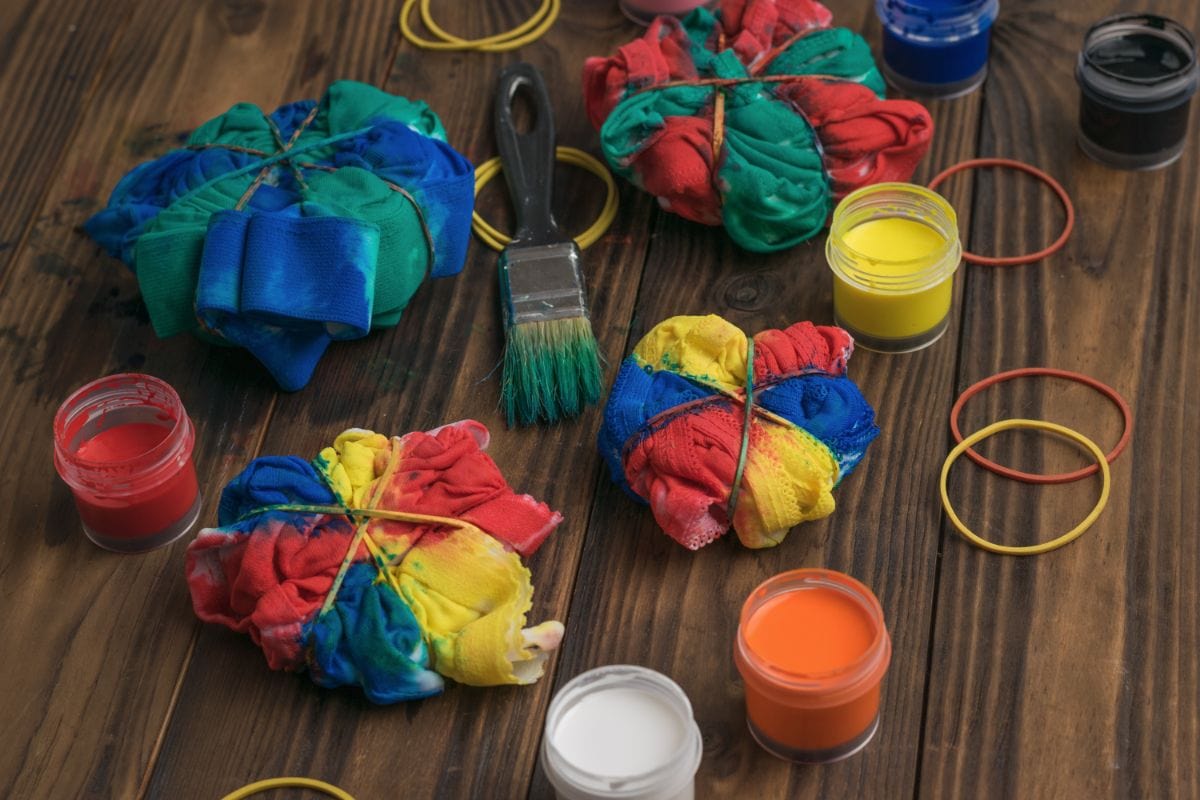
STEP THREE: TIE THE FABRIC
There are different ways to tie dye shirts. If you already have a pattern in mind, you can go ahead and tie the fabric using the elastic bands. If this is your first time, consider choosing a simple pattern. For a simple swirl design, lay your shirt and pinch a portion in the middle and start twirling it around.
When you've created a circle of swirl with your shirt, wrap it around with some rubber bands. It should look like a swirl pizza afterward.
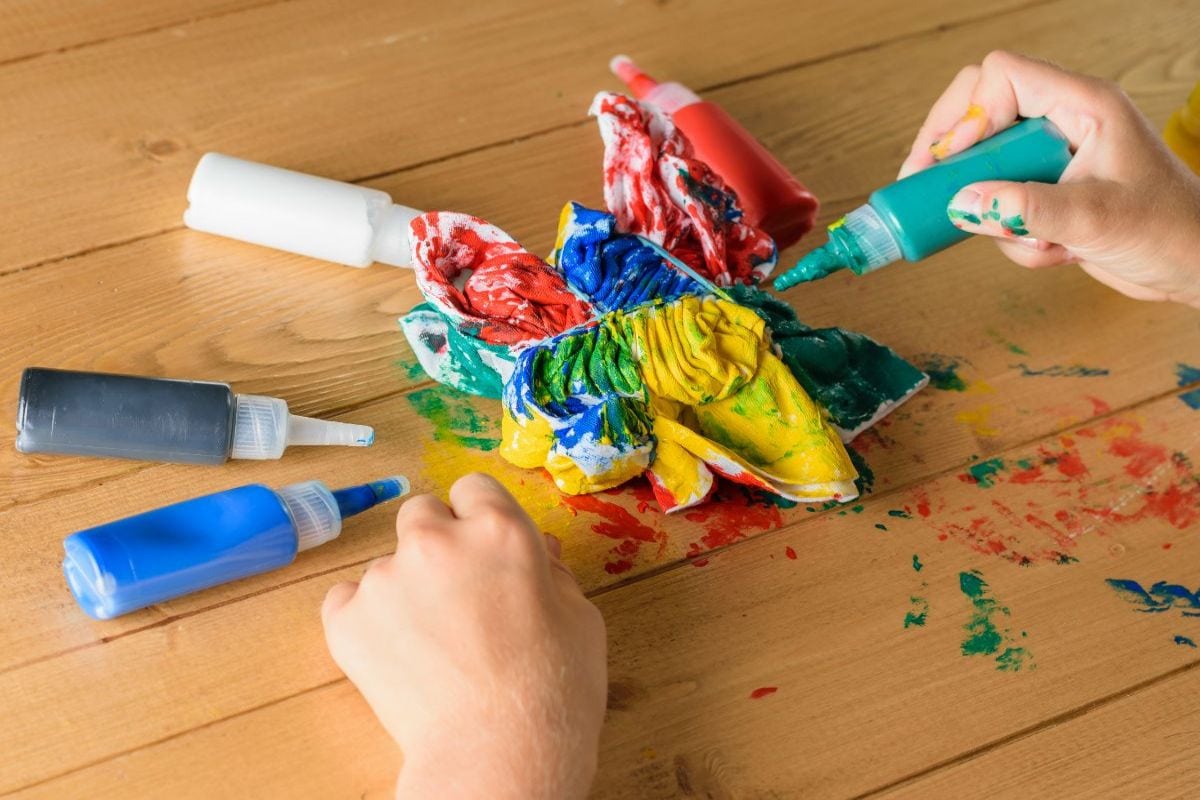
STEP FOUR: PLACE DYE
There are two ways this can be done, either dipping the whole thing in a container or bucket of dye or manually applying the dye with a paintbrush or squeeze bottles.
Soaking it in a container is best when using only 1 color. But, when using more different colors and for a more controlled application, it is recommended to use a bottle or paintbrush. To apply manually, place dye on the wedges between the rubber bands that have been placed earlier.
After applying dye to all of the sections, store the fabric in a Ziploc bag or any secure plastic bag just as long it remains damp. Allow that to set, the time will depend on the dye you are using but usually it takes about 6 to 8 hours. You can also leave it overnight for a brighter color.
STEP FIVE: RINSE
Once that's done, go ahead and rinse it off with running cold water. You are going to rinse until the water becomes clear.
STEP SIX: WASH AND DRY
After rinsing all the extra dye out, wash your shirt. You can wash it by hand or in a washing machine. Remember not to mix it with other clothes just yet to avoid staining, there still might be some extra dye on it. Dry it out and enjoy wearing your cool new tie dyed shirt!
TIE DYE PATTERNS TO TRY
With tie dye becoming popular again, there are so many patterns to choose from. You can even make your own pattern. Here are some of the patterns you should definitely check out and try:
- Crumple Tie Dye
- Bullseye Pattern
- Sunburst Tie Dye Design
- Horizontal Stripes
- Diagonal Stripes
- Kaleidoscope Tie Dye
- Ombre Tie Dye
- Heart Design
- Rainbow Pattern
- V Shape Design
SHOULD I USE A TIE DYE KIT?
Whether you have had a lot of experience with tie dyes or are just a beginner, you can use tie dye kits. Using tie dye kits also has its advantages – it's cheaper. Purchasing a tie dye pack instead of buying them individually from craft stores can save you some money.
Not just that, it is impossible to purchase all of the necessary items in one place while buying stuff individually. Therefore, buying a tie dye kit can help you save a whole lot of time. In addition to that, there are kits available depending on your needs.
Now, if you are planning to buy a tie dye kit, it might be a bit difficult to choose which one is the best and which kit you will need. To help you out here is a list of kits that you can check before you get one:
- Tulip One-Step Tie Dye Kit
- Rit Indigo Shibori Tie Dye Kit
- Jacquard Modern Tie Dye Kit
- Tomser DIY Tie Dye Pack
- Vanstek Tie Dye Bundle
Usually, these kits also have manuals included in their packages. You won't really need it since you will already learn how to make a cool tie dye shirt from this post! Tie dying is such a fun experience for both kids and adults, some of these kits are also great for kids to use as well.
TIPS FOR THE BEST RESULTS WHEN TIE DYING
Making tie dyes are easy and simple but it can also be hard when it is your first time. Follow these tips and you will get the best results when tie dying. Here is a list to help you out:
- Pre-wash Fabric – this is needed to let the dye stick more on the fabric.
- Allow the Dye to Set – to get the finest colors achievable, let the tie dye set for several hours. Wrap your clothing in plastic and set it aside for at least 6 to 8 hours after dying it. This period allows the color to absorb into the fabric's layers. Allow the dye to sit overnight or for up to 24 hours if you have extra time.
- Soda Ash Solution – using this before applying dye will make the colors more bright. However, it is only applicable to some dye mixtures.
- Rinse Thoroughly – it is important that the fabric is rinsed properly. This will also avoid dye residue to scatter when washed.
If you loved this how to make a cool tie dye shirt post, be sure to check out these other great DIY posts:
- T-Shirt Crafts for Kids
- All Natural DIY Lavender Bath Bombs
- Re-Usable DIY Decor Ideas for Any Birthday Party Theme
Be sure to PIN this for later and SHARE on Facebook!


- Homemade Baked Nacho Cheese Chips (Healthy) - April 29, 2024
- Easy Delicious Cajun Ham and Beans Slow Cooker Recipe - April 22, 2024
- Free Printable Graduation Coloring Pages for Kids - April 22, 2024
Leave a Reply