I am going to show you how simple it is to make a pocket for journal tags that you can use in scrapbook layouts. This fun spring layout is made with the March, 2019 scrapbook kit from the ScrapbookingStore.com.

HOW TO MAKE A POCKET FOR JOURNAL TAGS
Making a pocket for journal tags is VERY simple, but adds some great dimension to the layout. It is also a way to hide some of your journaling if that is something you want to have happen.
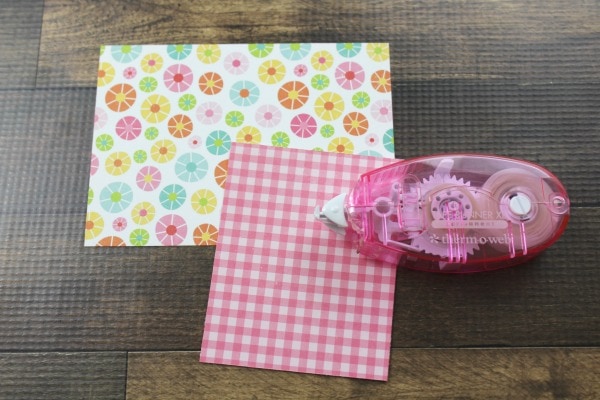
- To make the pocket for the journaling tag you will need 2 coordinating pieces of cardstock. I used the Echo Park Celebrate Spring Blooming Flowers cardstock. This allowed me to use both sides of the same piece of cardstock! (a big thanks to ScrapbookingStore.com for sponsoring this post and providing me with the kit)
- If you are using the Amy Tangerine Bits Die Cut Tags from the March 2019 ScrapbookingStore.com Monthly Kit then you will want to cut one piece of cardstock 3 1/2 inches by 5 inches. Cut the other piece of cardstock 3 1/2 inches by 2 3/4 inches.
- If you are using a different journaling tag that is fine. Just measure the tag and add on 1/2 inch to each side of the tag and about 1/2 inch to the top. The pocket needs to be bigger than the tag so that the journaling tags can fit inside easily.
- The pocket is simple to make. Take the smaller piece of cardstock and put adhesive along the very edge of 3 sides of the piece. Don't glue all 4 sides down or the journaling tags won't be able to fit inside!! Adhere it to the bottom section of the larger piece of cardstock.
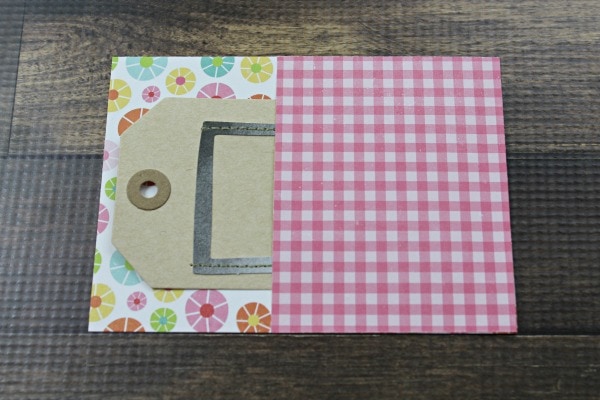
Now your journaling tag can go right into the pocket!
HAPPY DAY SPRING SCRAPBOOK LAYOUT
I love the bright colors and happy feel of the ScrapbookingStore.com March 2019 kit. Echo Park Paper Co. is one of my favorite brands and this Celebrate Spring collection is super fun.

To create this simple layout I have made a printable layout sketch for you. This layout sketch can be used for any layout!
You can download and print this layout sketch off by clicking this link or the image below: Happy Spring Scrapbook Layout Sketch
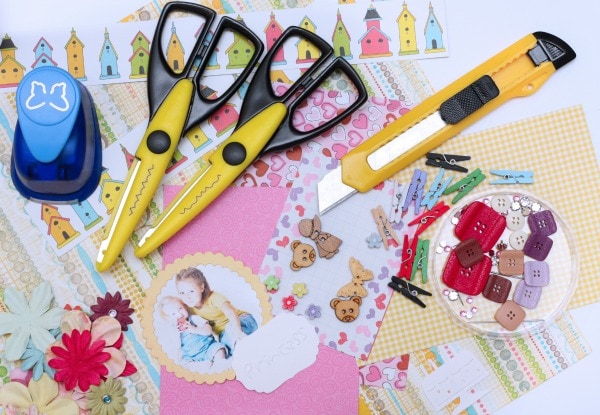
SUPPLIES NEEDED FOR HAPPY SPRING LAYOUT
- ScrapbookingStore.com March 2019 Kit
- 12 x 12 sheet of white cardstock
- Ribbon or thread
- Adhesive
- Scissors
- Paper Trimmer

- 2 1/2 inch circle punch or ability to cut a circle approximately that size
- 5 x 7 photo
- 4 x 6 photo

If you do not have the ScrapbookingStore.com kit here are the individual items I used from the kit:
- Echo Park Celebrate Spring Garden Tools cardstock sheet
- Echo Park Celebrate Spring Blooming Flowers cardstock sheet
- Element Sticker Sheet from Echo Park Celebrate Spring
- American Crafts Everyday Paper Flowers (I LOVE THESE!!)
- Amy Tangerine Bits 5 Die Cut Tags
- Project Life Enamel Stickers
HOW TO MAKE THE HAPPY DAY SPRING SCRAPBOOK LAYOUT
This spring scrapbook layout only took me about 20 minutes to put together. It was quick, easy and I love how it turned out.
Here are the simple instructions so you can make your own spring layout with a pocket for the journal tag!
- Cut a 1 inch by 12 inch strip from the Echo Park Celebrate Spring Garden Tools cardstock. I used the yellow polka dot side for the middle of the page strip. Adhere this strip vertically down the center of the white cardstock.
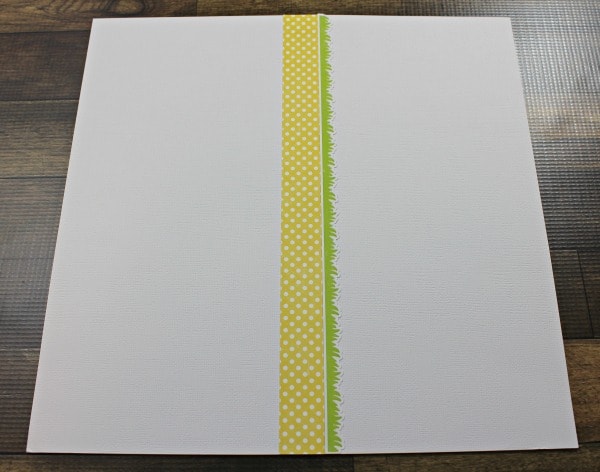
- Take the green grass long sticker from the sticker elements sheet and place it right up against the yellow strip on the white cardstock.
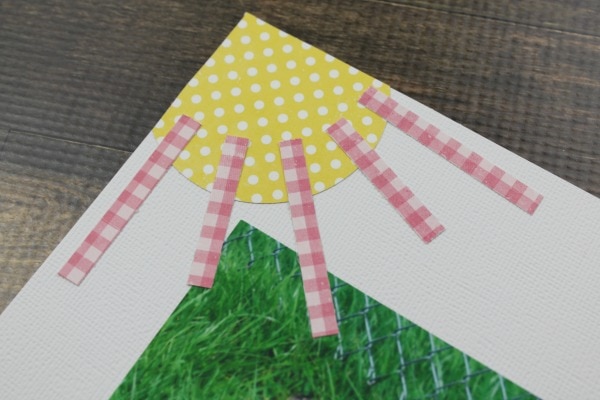
- Cut out a 2 1/2 inch circle from the same yellow polka dot paper. I used my big EK Success circle punch to do this.
- Adhere the circle to the upper left corner of the white cardstock. Parts of the circle will and should hang off the edge. Trim the hanging pieces with your scissors.

- The 5 x 7 photo can be placed now. I placed mine about 1/2 inch below the yellow sticker and about 1 1/2 inches from the left side of the cardstock.
- Adding some sun rays to the left corner adds something extra to this layout. Just cut a thin strip of the red checkered paper about 1/4 inch wide. Then cut that thin strip into 2 inch and 1 1/2 inch pieces. I alternated the longer and shorter pieces to make the sun rays. I had 3 longer rays and 2 shorter rays.
 to do this.
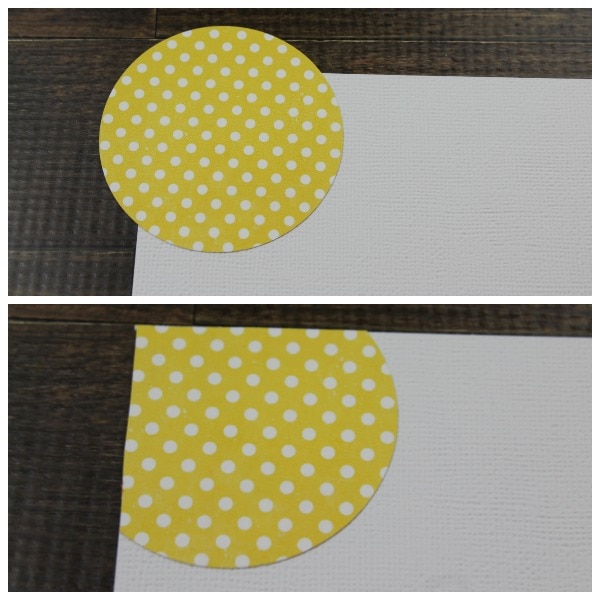
- Make your journal tag pocket as instructed earlier in this post. Place the pocket horizontally offset towards the bottom of the large photo.
- Take your 4 x 6 photo and cut it down to about 4 inches by 3 1/2 inches. Adhere it to the right side of the large photo above the pocket.
- Complete your journaling on the journal tag. It is fine to write on the back side of the tag if you have a lot to say!
- Add some ribbon or thread to the end of the journal tag. I also added a heart from the Project Life Enamel Stickers. Place the journal tag into the pocket.
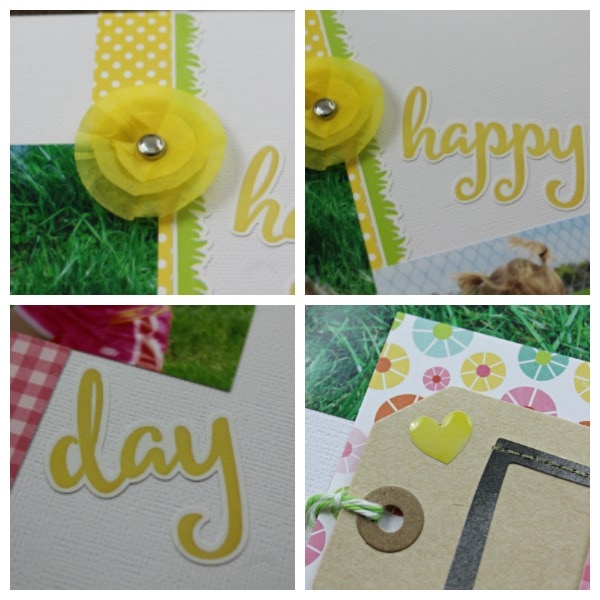
- Now it is time to add more embellishments. I added 2 of the paper flowers, some flower stickers and the happy day word stickers. Feel free to add a much or as little as you like!
- The finishing touch was adding the small rectangle sticker to the bottom corner of my pocket. I wrote my daughter's name and the date on this sticker. I always like to add this info to my layouts!

Be sure to check out my layout from last month's kit and this HUGE list of monthly scrapbooking kits.


- Is a Mommy Makeover the Right Step for You? Here Are 5 Things to Consider - June 26, 2026
- How to Simplify Your Vacation Planning Process - June 26, 2026
- 7 Benefits of Choosing Blepharoplasty for a More Refreshed Appearance - June 25, 2026

