Looking for a holiday activity that everyone will love?
Tie-dye shirts are super trendy right now. Whether it's for summer vacation or a family getaway, it's an activity that takes everyone off their screens and into something truly enjoyable. It's fun, colorful, and messy. Not to mention the outcome is one of a kind every time.
The best part?
You need no special talents or a big budget. All you need is some basic materials, and you can transform an ordinary shirt into a work of wearable art.
This blog walks you through step by step how to plan your holiday tie-dye fun.
Here's the lineup:
- Why tie-dye makes such a great holiday activity
- What supplies you'll need
- The best tie-dye techniques to try
- Pro tips to get vibrant results every time
Let's jump in!
Why Tie-Dye Is The Perfect Holiday Activity
Tie-dye is one of those rare activities that works for almost every age group.
Children love it. Teens love it. Once your grandparents figure out how these patterns POP, they will be doing it too. And here's why…
It's just plain fun.
It's not just because tie-dye is fun, though that certainly doesn't hurt. Tie-dye is also making a huge comeback fashion-wise. The textile dye market is expected to rise at a 9.3% CAGR through 2029, while tie-dye specific products have experienced 264.3% growth over the past 2 years.
Translation? What you make at home is actually on trend.
When picking up some summer t-shirt blanks for your vacation activities, buy them in cotton. Cotton absorbs tie-dye the best out of any material and allows for those awesome bright colors that won't fade after washing. Blank shirts are the base for any tie-dye clothing masterpiece.
Here are the other big benefits of tie-dye as a holiday activity:
- It's cheap — a basic dye kit and couple shirts won't cost you much money
- It gets everyone involved — nobody is sitting on the sidelines
- It's creative — no two shirts ever come out the same
- You get something to keep — a wearable souvenir from the holidays
That last part is what makes tie-dye so amazing. Most holiday events take an hour. When you tie-dye, you leave with something wearable.
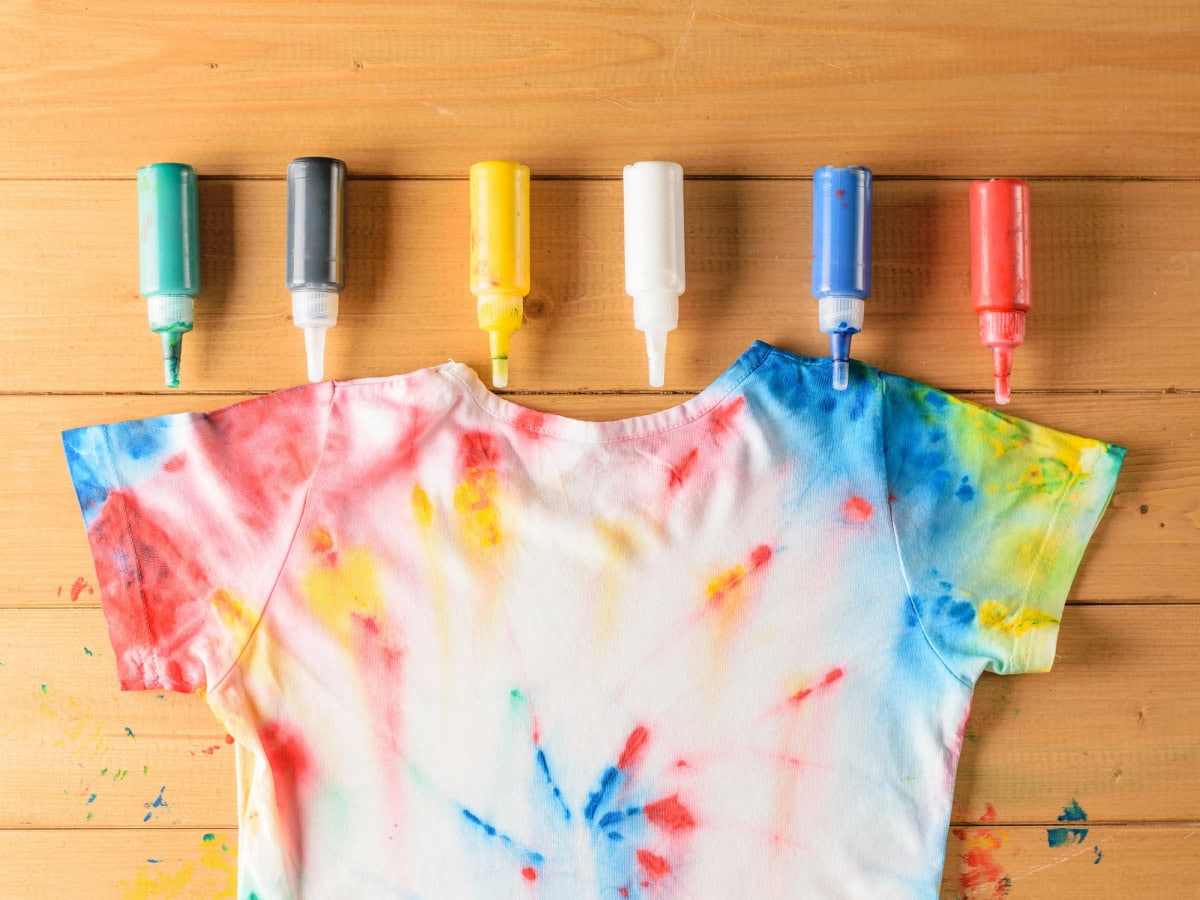
What You'll Need For Tie-Dye Clothing
Setting up a tie-dye session is way easier than most people think.
Here's your shopping list:
- White or light-coloured t-shirts (100% cotton works best)
- A tie-dye kit OR squeeze bottles + fabric dye
- Rubber bands (lots of them)
- Plastic gloves
- A plastic tablecloth or old sheets
- Resealable plastic bags
- Soda ash (optional but recommended)
The tablecloth is a requirement. Tie-dye bleeds on everything it contacts and that means your patio table, your counter top, and the lawn.
And that's no exaggeration.
When selecting shirts to dye, pre-washed cotton blanks are the way to go. This is because most shirts come with a factory coating on them that can prevent dye absorption. If purchasing bulk blank shirts for a large group, washing them is the first step you should take.
Best Tie-Dye Techniques To Try This Holiday
Now for the fun part… Picking your technique.
You can make dozens of different patterns. These three, however, are the easiest to learn. And they always look fabulous — even for beginners.
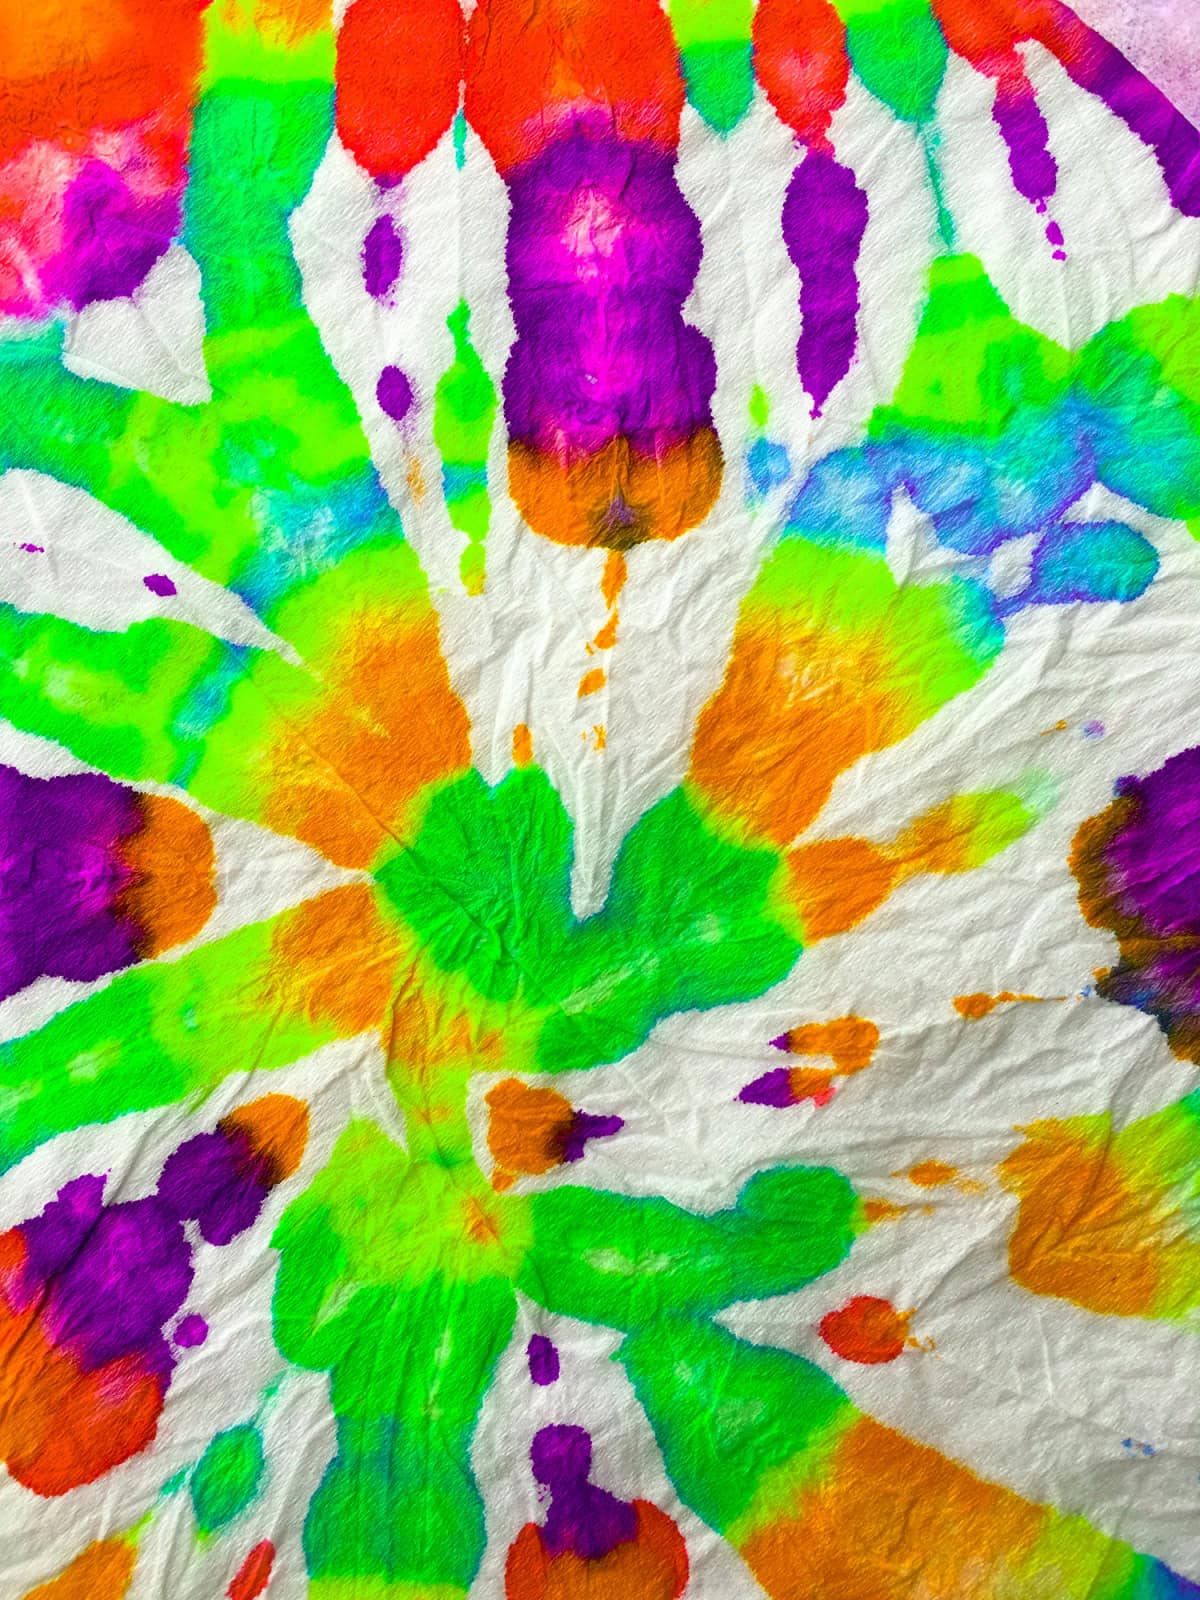
The Classic Spiral
This is the technique everyone thinks of when they picture tie-dye.
Here's how to do it:
- Lay your shirt flat on the table
- Pinch the centre of the shirt
- Twist the fabric clockwise until the whole shirt forms a flat spiral
- Use 4-6 rubber bands to divide the spiral into wedges
- Apply different colors to each wedge
The spiral works great because it separates the image into distinct areas for each color. Even novices experience stunning results with their first print.
The Crumple Technique
Want a more random, abstract pattern? This is your method.
Ball up the shirt into a flat pile. Do not fold or roll — just wad up. Place several rubber bands around the top, and apply your colors.
The crumple creates that “marbled” effect you see on most designer items these days.
Ice Dyeing
This is the newest trend, and the results look incredible.
Lay your shirt flat, scrunch up and cover with ice. Then sprinkle dye powder onto the ice. The melting ice carries the dye onto the shirt, creating watercolor-like patterns.
The downside? It takes a few hours for the ice to completely melt. Consider this when planning.
Tips For Vibrant Tie-Dye Clothing Results
Most first-time tie-dyers make the same mistakes.
Here are some tips to help avoid these mistakes and end up with shirts that look vibrant and colorful (not washed out).
- Soak your shirts first — wet fabric takes dye easier
- Use lots of dye — thin coats lead to dull pastel colors
- Let it sit — place plastic around your shirts and wait 6-24 hours
- Rinse in cold water — hot water will wash the dye right out
- Wash separately the first 2-3 times — new tie-dye bleeds a lot
The step most people forget is the “let it sit” step. They just can't wait and rinse too soon! The longer the dye sits, the richer and more vibrant the colors.
Patience pays off here.
Clothing that you tie-dye is another way to upcycle old clothing. Old stained white shirt about to go in the garbage? Throw some dye on it. Now you have something to wear.
One reason tie-dye has been so popular lately is because it's part of the sustainable fashion movement shoppers care about. When you dye your own clothes, you're being resourceful AND eco-friendly.
That's a win-win.
Bringing It All Together
Tie-dye clothing is the ideal holiday activity for groups of any size.
It's inexpensive, it's artsy, and everyone goes home with something they created. So, to sum up:
- Pick up some 100% cotton blank shirts
- Grab a tie-dye kit and basic supplies
- Try a few different techniques (spiral, crumple, ice dye)
- Be patient with the dye and let it sit for hours, not minutes
- Rinse cold and wash separately the first few times
Whether you're throwing a kid's birthday, family reunion, or looking to kill some time on a rainy summer afternoon — tie-dye always works.
So grab your blanks, pick your colors, and get ready to make a mess.
The results are absolutely worth it.


