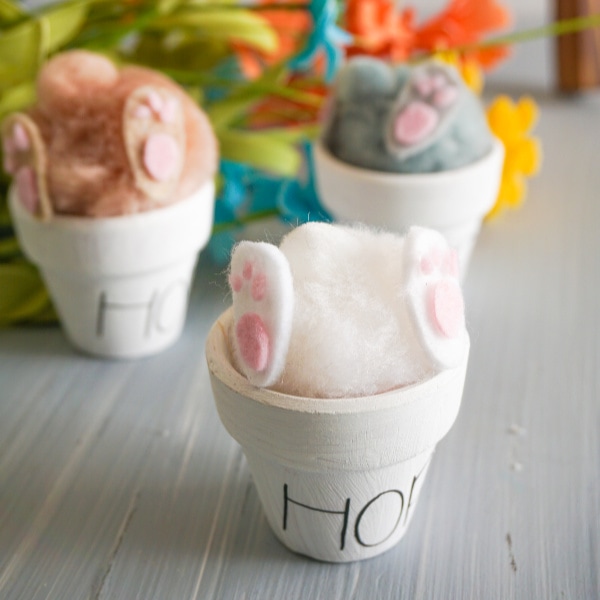
This Bunny in a Pot Cricut craft is perfect for Easter and springtime. A simple and quick spring craft that will make you smile because it comes with a free SVG file to make it even easier! Who doesn't love little bunny buns?

SUPPLIES NEEDED TO MAKE A BUNNY IN A POT
I will start by saying that you will definitely want to make more than one of these adorable little bunny bottoms. These make wonderful gifts. So plan your supplies according to how many you plan to make.
I have listed the supplies assuming you will make 3 pots with 3 different colored bunnies.
- 3 Tiny Terracotta Pots (1-inch pots)
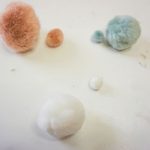
- Medium-sized Pom Poms (1 each of brown, grey, and white)
- Tiny Pom Poms (1 each of brown, grey, and white)
- Felt sheets in pink, brown, grey, and white
- Black Heat Transfer Vinyl
- White Acrylic Craft Paint
TOOLS NEEDED FOR EASTER BUNNY PROJECT
This project utilizes two different Cricut tools. If you do not have these crafting tools feel free to paint the word on the pots with black craft paint.

HOW TO MAKE BUNNY IN A POT CRICUT CRAFT FOR EASTER
This is a very simple craft to make, and if you are new to using the Cricut, it is a good starter project.
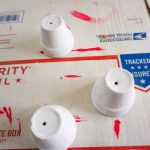
STEP ONE: PAINT POTS
Start off by painting the three mini terracotta pots white with the acrylic craft paint.
Set them aside so they can dry completely. While they are drying, you can start working on cutting out the bunny feet and words on the Cricut.

STEP TWO: LOAD FILE
It is time to load the FREE SVG file into Cricut Design Space.
Grab the file here: Bunny in a Pot SVG File
STEP THREE: USE CRICUT DESIGN SPACE
Now that you have the SVG file loaded into Cricut Design Space, start working on the word HOP.
Space and size the “HOP” text and bunny foot to be the size you would like them to be.
I used a 1-inch height on HOP and 1/2 inch height on the bunny foot.
Attach the lettering so you don't have to wrestle with separate letters. Then duplicate the text two more times so you have 3 HOPS.
If you are making more than 3 pots, then go ahead and duplicate the number you will need.
Do the same with the bunny feet. If you make 3 pots, then you will need 6 bunny feet.
Once you get the items duplicated, you can tell the Cricut to make it!

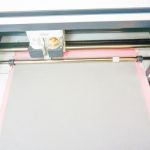
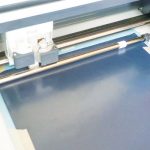
STEP FOUR: CUT
You will be loading the black HTV for the text. Please remember to MIRROR the text.
You will use the felt for the bunny feet. So 2 feet from the grey, brown and white felt.
The bunny toes will be cut on the pink felt.

Weed the designs after they are cut.
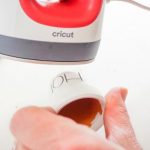
STEP FIVE: ATTACH TEXT TO POTS
Now it is time to attach the HOP text to each of the pots.
Place the text on the pot and use a Cricut EasyPress Mini to attach it to the pot.

STEP SIX: MAKE BUNNIES
It is time to make the bunnies.
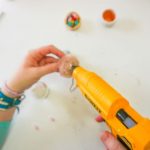
Start off by assembling the bunny feet. Hot glue the toes and foot pad to each foot.

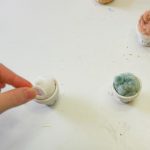
Hot glue the larger pom pom into each terracotta pot.
Glue the same colored tiny pom pom on top of the larger pom pom for the bunny's tail.
Last, glue the feet onto the side of the large pom poms, and you are done!

BUNNY IN A POT PRINTABLE TUTORIAL
You can print off the supplies and instructions for this cute craft project via the card below.

This adorable bunny in a pot Cricut craft is perfect for Easter and springtime.
- 3 Tiny Terracotta Pots
- Medium-Sized Pom Poms 1 each: brown, grey and white
- Tiny-Sized Pom Poms 1 each: brown, grey and white
- Grey felt
- Brown felt
- White felt
- Pink felt
- Black Heat Transfer Vinyl
- White Acrylic Craft Paint
-
Paint your three terracotta pots white and allow them to dry completely.

-
Load the cut file to Cricut Design Space and size the “HOP” text and bunny foot to be the size you’d like (I used a 1-inch height on “HOP” text and ½-inch height on the foot), attach the lettering so you don’t have to wrestle with separate letters, then duplicate the “HOP” text twice for a total of 3 “HOP”s and duplicate the bunny foot 5 times so you have a total of 6 bunny feet. If you chose pom poms that are different colors, change the colors of the feet pairs to match. Tell Cricut Design Space to “Make It”.
-
Load and cut your material to cut the felt feet and toes, as well as the “HOP” text. Be sure to mirror the text, since we’re using HTV.
-
Weed the designs.
-
Use the EasyPress Mini to affix the “HOP” lettering to the front of each pot.
-
Assemble the feet by hot gluing the toes and foot pad to each foot.
-
Hot glue a larger pom pom into a terracotta pot.
-
Hot glue a tiny pom pom on top of the larger pom pom as the bunny tail.
-
Hot glue the feet onto the side of the large pom pom and enjoy!


If you loved this Bunny in a Pot craft, be sure to check these out:
- DIY Spring Button Picture Frame
- DIY Activities You Can Do With Your Kids This Spring
- How to Make Rainbow Slime
- Spring Scrapbook Layout
Be sure to PIN this post!


- A Guide to Assessing and Selling Valuable Possessions - July 20, 2026
- How to Inspect an Inflatable Water Slide Before Each Use - July 20, 2026
- Uncovering Health Clues Through Your Hearing - July 18, 2026
