Spring time is in the air and this DIY Spring Button Picture Frame will bring just the right colors to your home! It is time to start decorating the mantel for Easter and I knew I could easily make an old frame look new with a little bit of work! 
DIY SPRING BUTTON PICTURE FRAME
The great thing about this project is that it can be made specific to your personal decor tastes. I liked using an oval frame because I think it resembles an Easter egg. Any shape frame will work though. It is also easy to coordinate your button colors to match the colors in your photo.
Plus repurposing items around the house is a way to save money and is good for our world!
SUPPLIES FOR BUTTON PICTURE FRAME
I actually had all of these items on hand at home. This made me smile because I didn't have to make a run to the store or spend any extra money on this project!
The button picture frame was a great way to use up some of my buttons—I have a little button obsession, LOL!
- Picture Frame
- Lots of Buttons
 in a variety of sizes
 - Hot glue gun
- Extra Glue Sticks
- Photo for your frame
 in a variety of sizes


HOW TO MAKE A BUTTON PICTURE FRAME
This is a forgiving project and if you make a mistake it is fairly easy to correct it. Plus there is no right or wrong way to position the buttons on this button picture frame. If you like how it looks that is all that counts!
- First you need to have a game plan for the color scheme you want for your frame. I wanted my frame to have lots of pretty pastel spring colors along with a lot of white buttons.
- I like to glue a flat layer of buttons all over the frame so it has good coverage to hide the frame itself.

- Next you will just do random layering of more buttons until you like the way it looks.
- Remember that hot glue burns HURT and be careful when you are gluing the buttons down. I just use a small dab of hot glue for each button. Some of the glue will push through on the buttons that have holes in them.
- Once you have glued all the buttons you want onto the frame, allow the glue to dry. Now you can cut off all the little glue strands that hot glue always leaves behind.

PICK THE RIGHT PHOTO FOR YOUR NEW SPRING FRAME
First off I want to say thanks to Portrait Innovations for sponsoring this post! All opinions are 100% my own!
My girls just had some spring “sister” pictures taken at Portrait Innovations recently. Portrait Innovations always offers the best spring specials! We got the Spring 24 Portrait Package for only $19.99 plus a Free $100 16×20 Canvas!
I love how easy it is to share our pictures with the huge portrait package they are offering! The portrait package includes 1-10×13 Wall Portrait, 2-8x10s, 4-5x7s, 4-3x5s, 8-2x3s, and 5-5×7 cards, plus a high-resolution CD with your favorite pose. And, you can save 20% on all additional purchases in studio. Portrait Innovations never charges sitting fees so bring the whole family. Appointments are limited so schedule your appointment today!
I was really happy with how our portraits turned out. The photos really got me in the mood for spring and decorating for Easter! I also used these photos as our “school pictures” for this year! That is one way I can save some money and know I am getting pictures I love.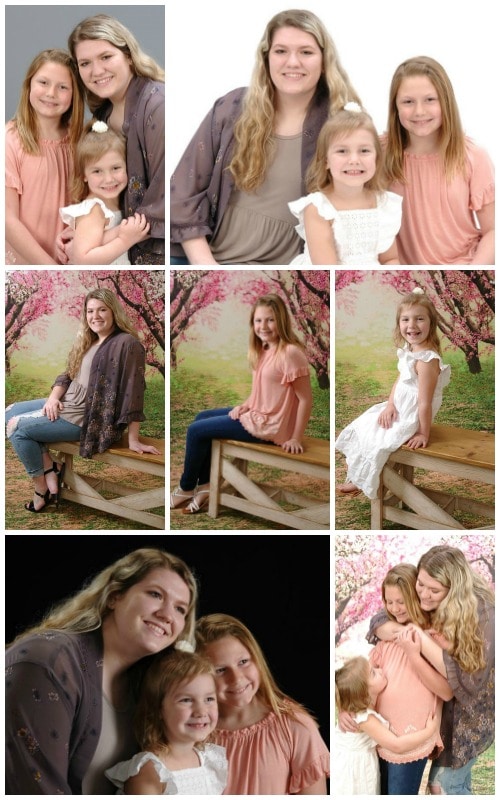
Do you make any button crafts? I kind of have an obsession with buttons and am trying to get creative with different ways to use them. Check out this fun button craft for Father's Day! Do you have pictures taken of your kids during the spring?


One Comment