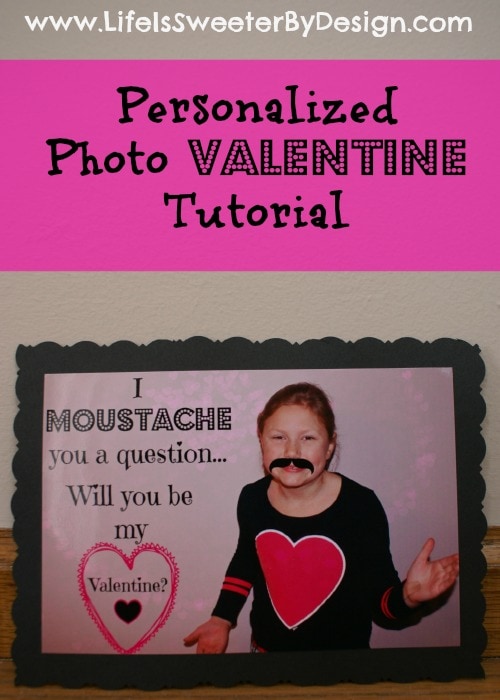
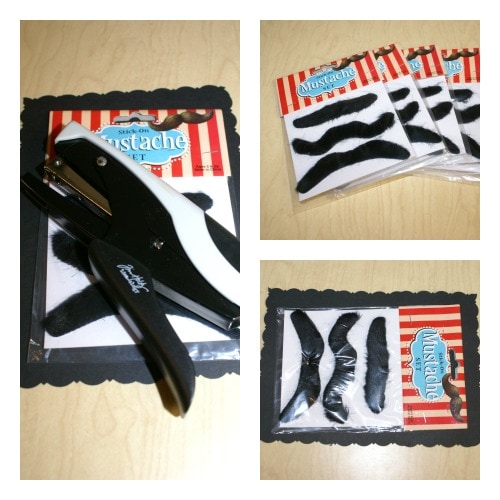
Here is a great Valentine Tutorial! This year I decided it would be cute to do a “moustache” themed Valentine for my 8 year old daughter. I had her put on a cute shirt with a big pink heart on it…had her pose and took her picture. Then I used Picmonkey to edit the photo and personalize it for the Valentine. Then I mounted the photo onto some cardstock that I trimmed up with some decorative scissors. Last I attached some “real” fake moustaches as a gift for each child that gets a Valentine!
My daughter thought this personalized Valentine tutorial was really cute….she thinks the picture of her with the moustache is hilarious! She also knows the kids in her class will love getting the fake moustaches to wear.
If you aren't familiar with Picmonkey….you should be! It is a really fun photo editor that is SO easy to use. I have been having a blast using it to alter pictures for scrapbooking and other crafts. There is a free version that has lots of great features and a very cheap paid version that is WONDERFUL….did I mention inexpensive? 🙂
Personalized Photo Valentine Tutorial
I thought others may want to try out a Personalized Photo Valentine for their children. Here is a tutorial of how I made this valentine.
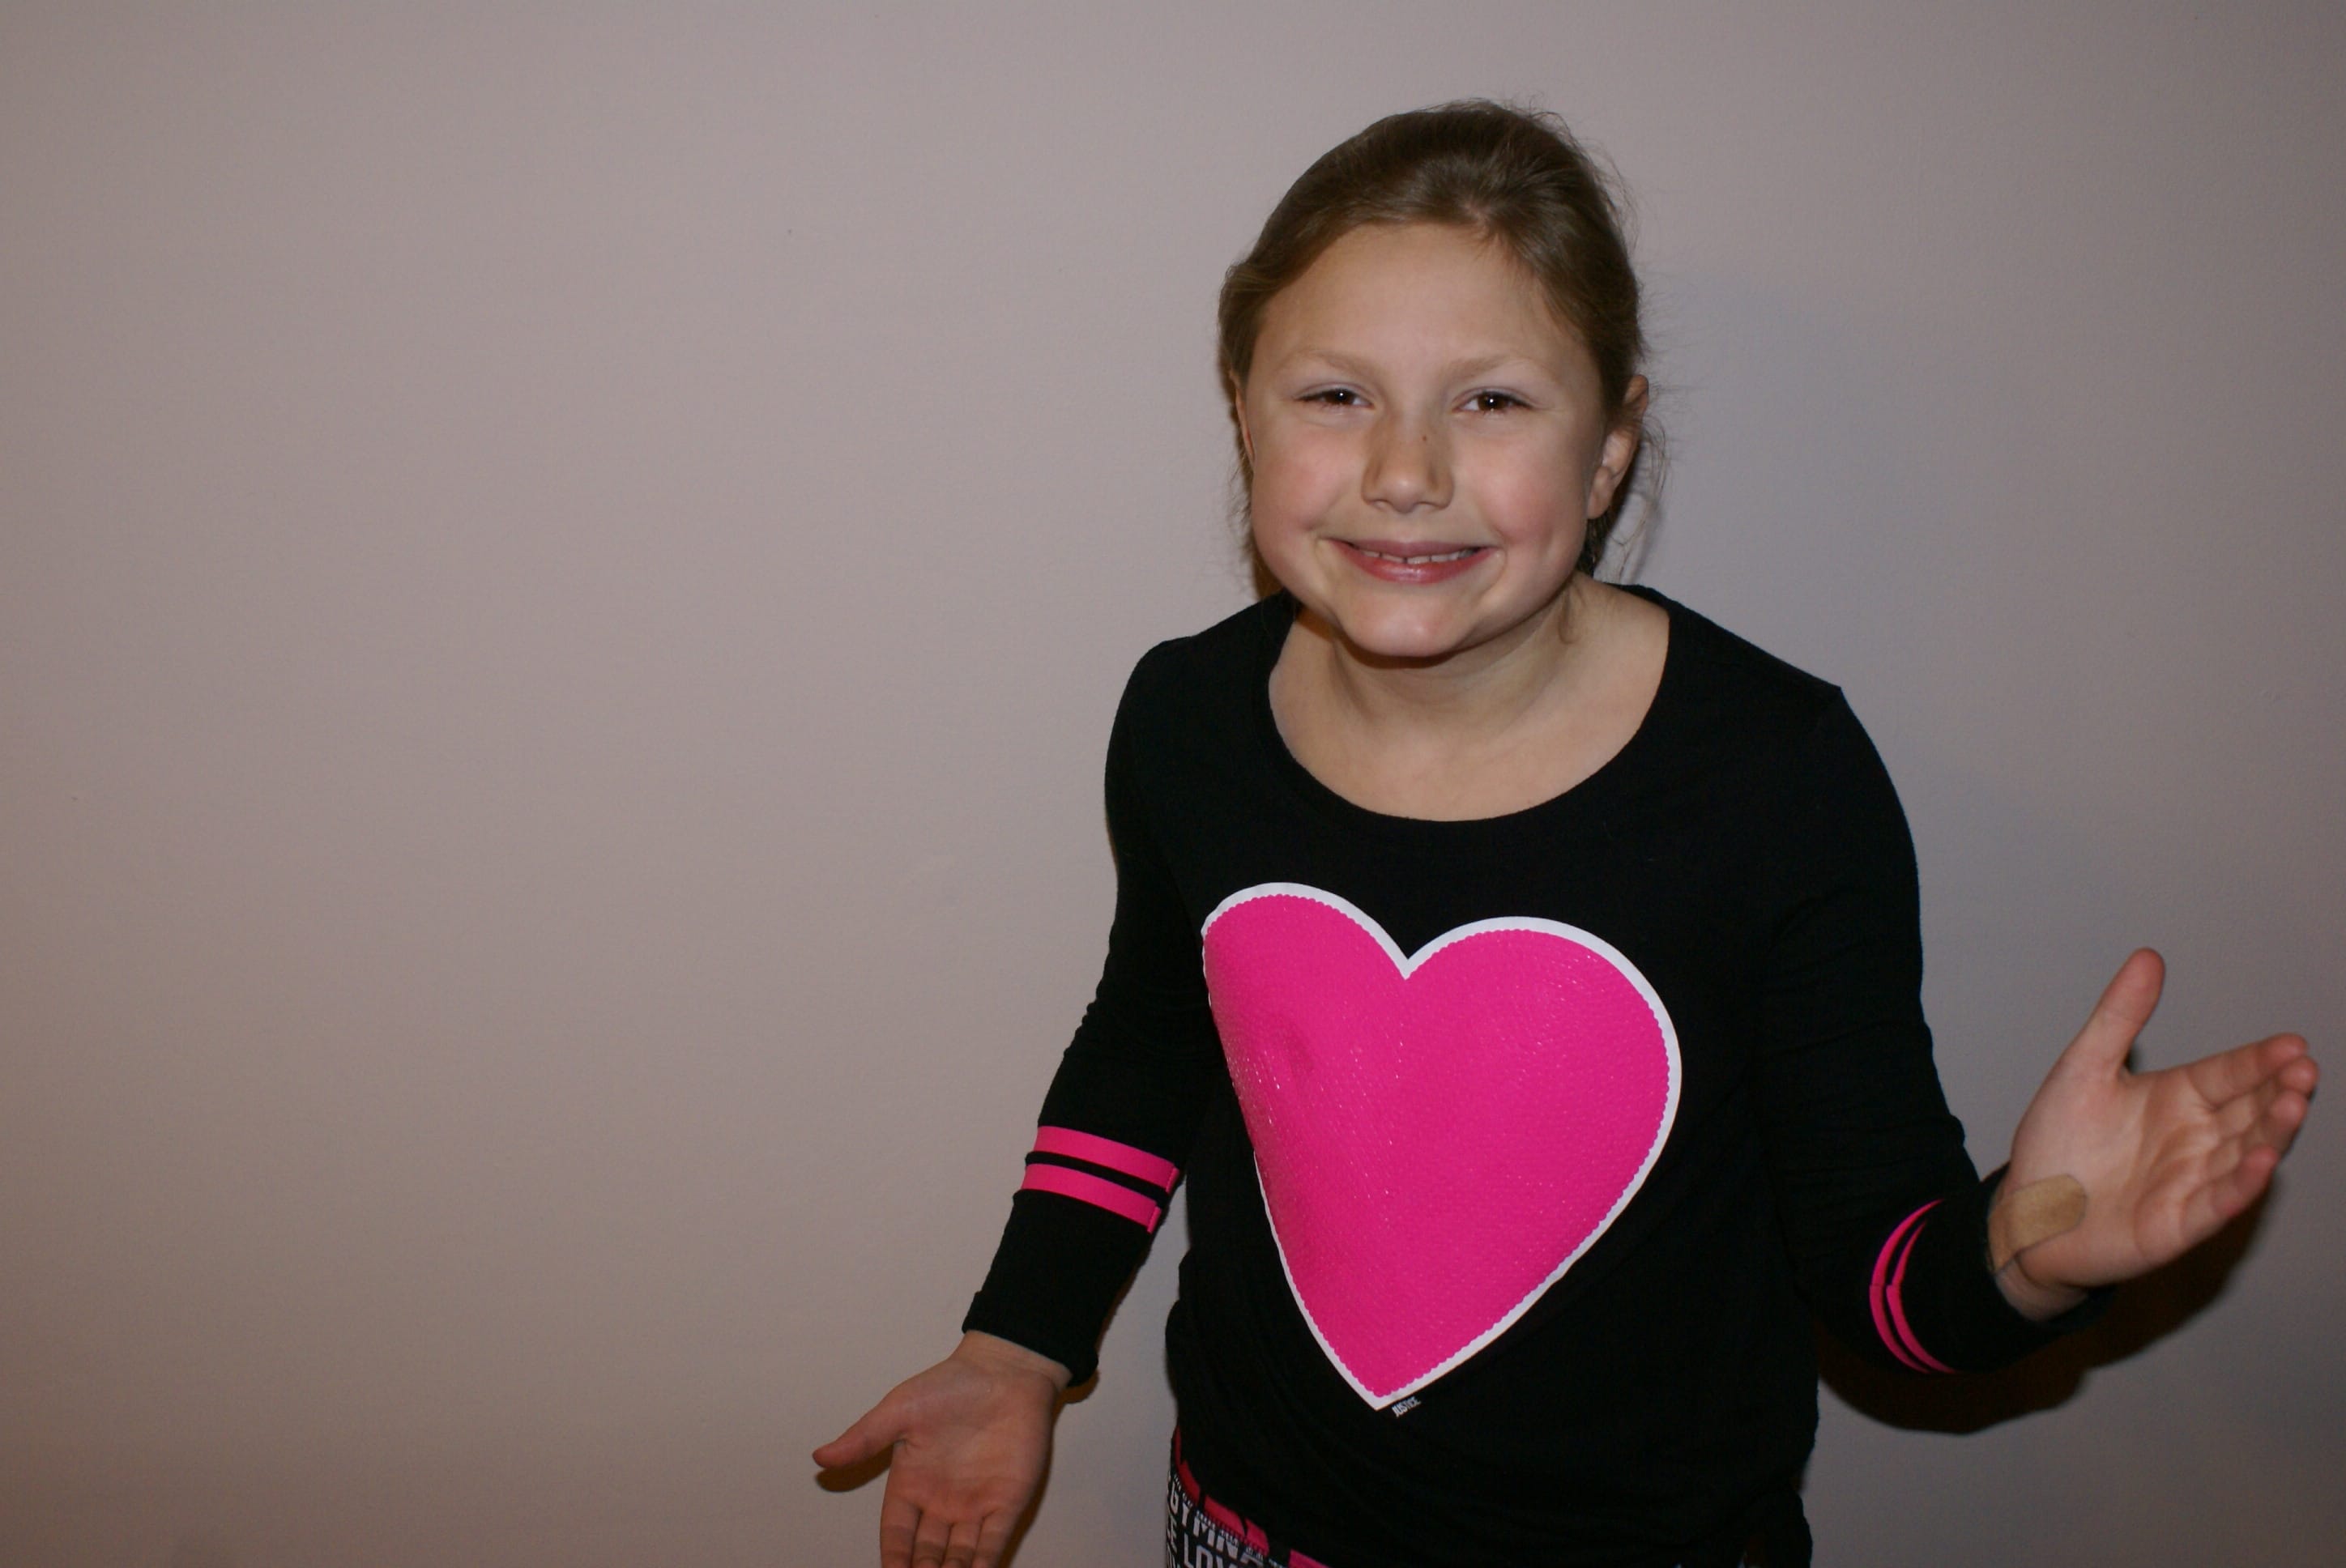
1. Take your child's picture. I would advise you to have the child kind of off to one side so that you have some free space in the picture to add wording. Here is the photo I started out with:
2. Next you will want to go to www.picmonkey.com and click on EDIT and upload your picture to Picmonkey. This is a screenshot of how it will look in Picmonkey.
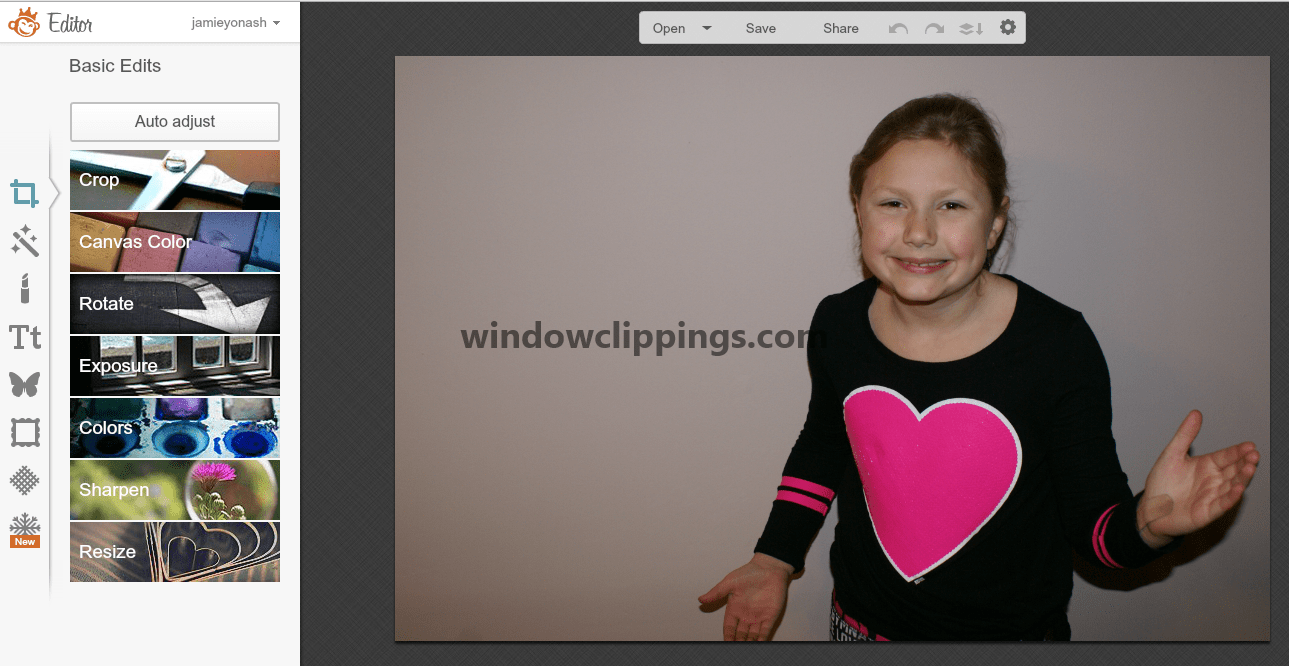
3. If you need to crop your picture that will be your next step. You will see a box labeled “crop” on the left hand side of the screen. Click on this box and you will be able to crop your image to your liking.
4. Next you will click on the butterfly along the left hand side. This is for overlays. Scroll down in the overlay category until you see one for “facial hair”. Open that overlay category. You can choose which moustache you would like your child to have! 🙂 You will simply click on the one you want and that will put it onto your picture. Use your mouse to move it around and you can resize it with the white box that is around the graphic. Place the moustache where you want it and just click off of it to keep it in place. If you want to move it later just click on the graphic and it will bring the white box back up.

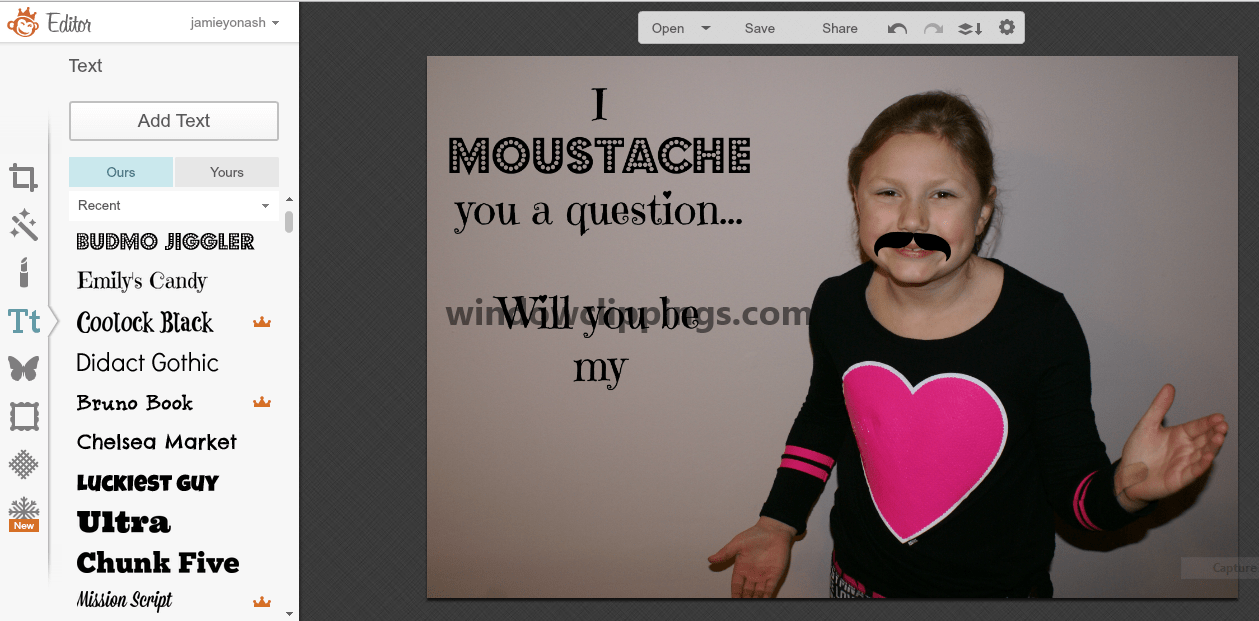
5. Next you will want to add your wording. You can use whatever cute wording you want! You will click on the Tt in the left hand sidebar. This will give you a list of fonts to choose from. Scroll down the list and decide which font(s) you want to use. Click on the font you want and then click the ADD TEXT box at the top of the fonts list. Here is a screenshot of what you will see:

6. Now you will type your text into the box that is now on your photo. The Text box that came up allows you to choose font size colors, etc. So you can play around with it however you want. You can move the text box around also. I used 2 different fonts. I typed what I wanted to say and then highlighted the word “moustache” and while it was highlighted I clicked the other font I wanted and it switched to that font.
7. I wanted to put the word “Valentine” inside a heart…to make it a little cuter. So before I typed the word “Valentine” I put my heart graphic on the photo. If you want to use a heart or other graphic…you will go back over and click on the butterfly on the left hand side. Go to the category Doodly Hearts and click on it to show your heart options. Choose the one you like and click on it to put it on your photo. Now you can change the size, color, etc.
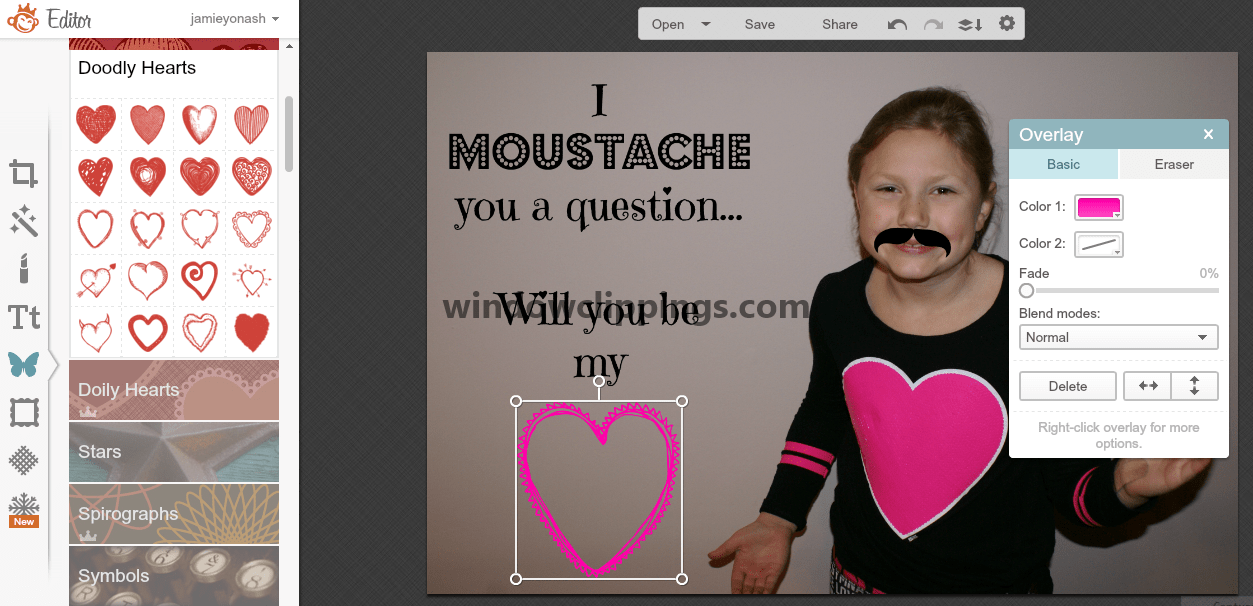
8. Once you have the heart the way you want it you will need to add the text to the inside of the heart. Click on the Tt on the left hand side and choose your font style again. Click on ADD TEXT. Move the text box to the heart and size it down so it fits inside the heart. Here is how that will look:

9. I felt like the inside of the heart looked a little bare, so I added another small heart graphic. I went back into the overlays (butterfly) and this time I chose a Doily Heart because I wanted a 2 color contrast. The Doily Hearts are only available with the paid Picmonkey membership. If you are working on the free version then you will need to chose a graphic that isn't in the “royale” section. Just place your heart inside the bigger heart and resize it to look good and change the colors if you want.
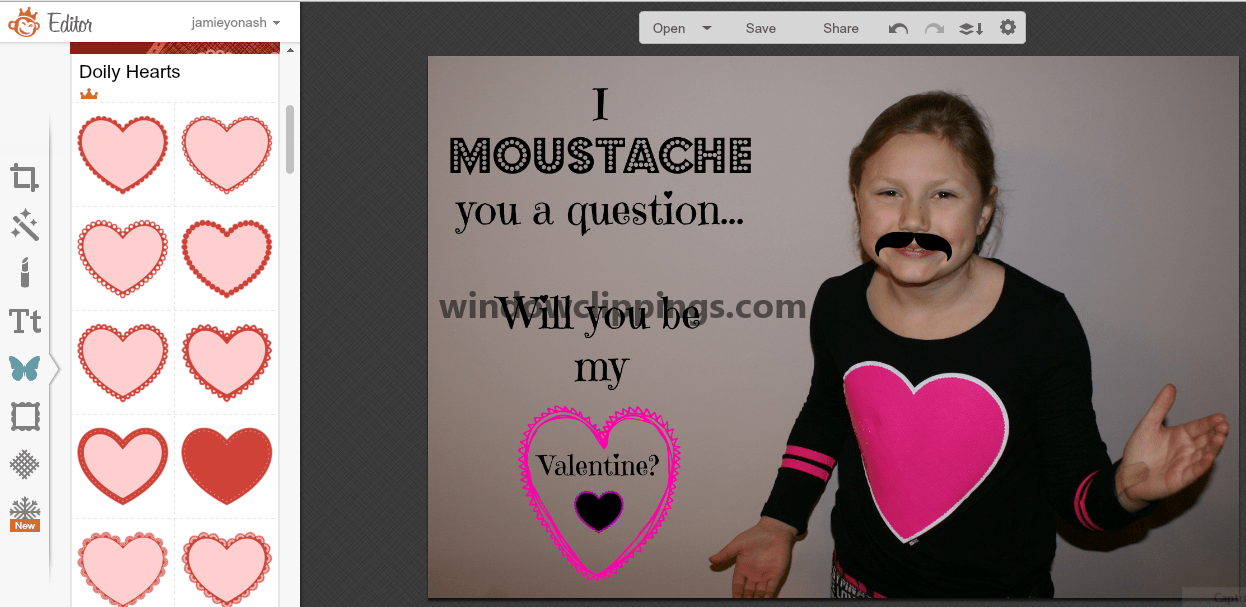
10. You can stop here if you want or you can jazz it up a little more. I decided to jazz it up a little more. I clicked on the snowflake button and it lists different themes. I chose the Sweethearts. Once you click on Sweethearts you will see Effects….under effects I chose “Bokah Hearts”. This puts some small shiny almost translucent hearts in the background of the photo. I think it gives the photo a really cool look. The only problem is that the hearts are sporadically around the photo…and some were on her face. Here is how it looked:

In the box on the left under Bokah Hearts….you will see a blue paint brush. This brush will let you get rid of the hearts in places you don't want them. When you click on the blue paintbrush, a little white circle will show up as your cursor. Just move the circle to where you don't want the hearts and hold down the right clicker while you “erase” the hearts from that area. It is very easy to do! Once you are happy with it, click APPLY.
11. Now you are done with the photo editing portion! You will click on the Save button on the top middle bar and save the picture to your computer. Then you can print it off at home or have the pictures printed off somewhere else…my favorite place is Shutterfly!
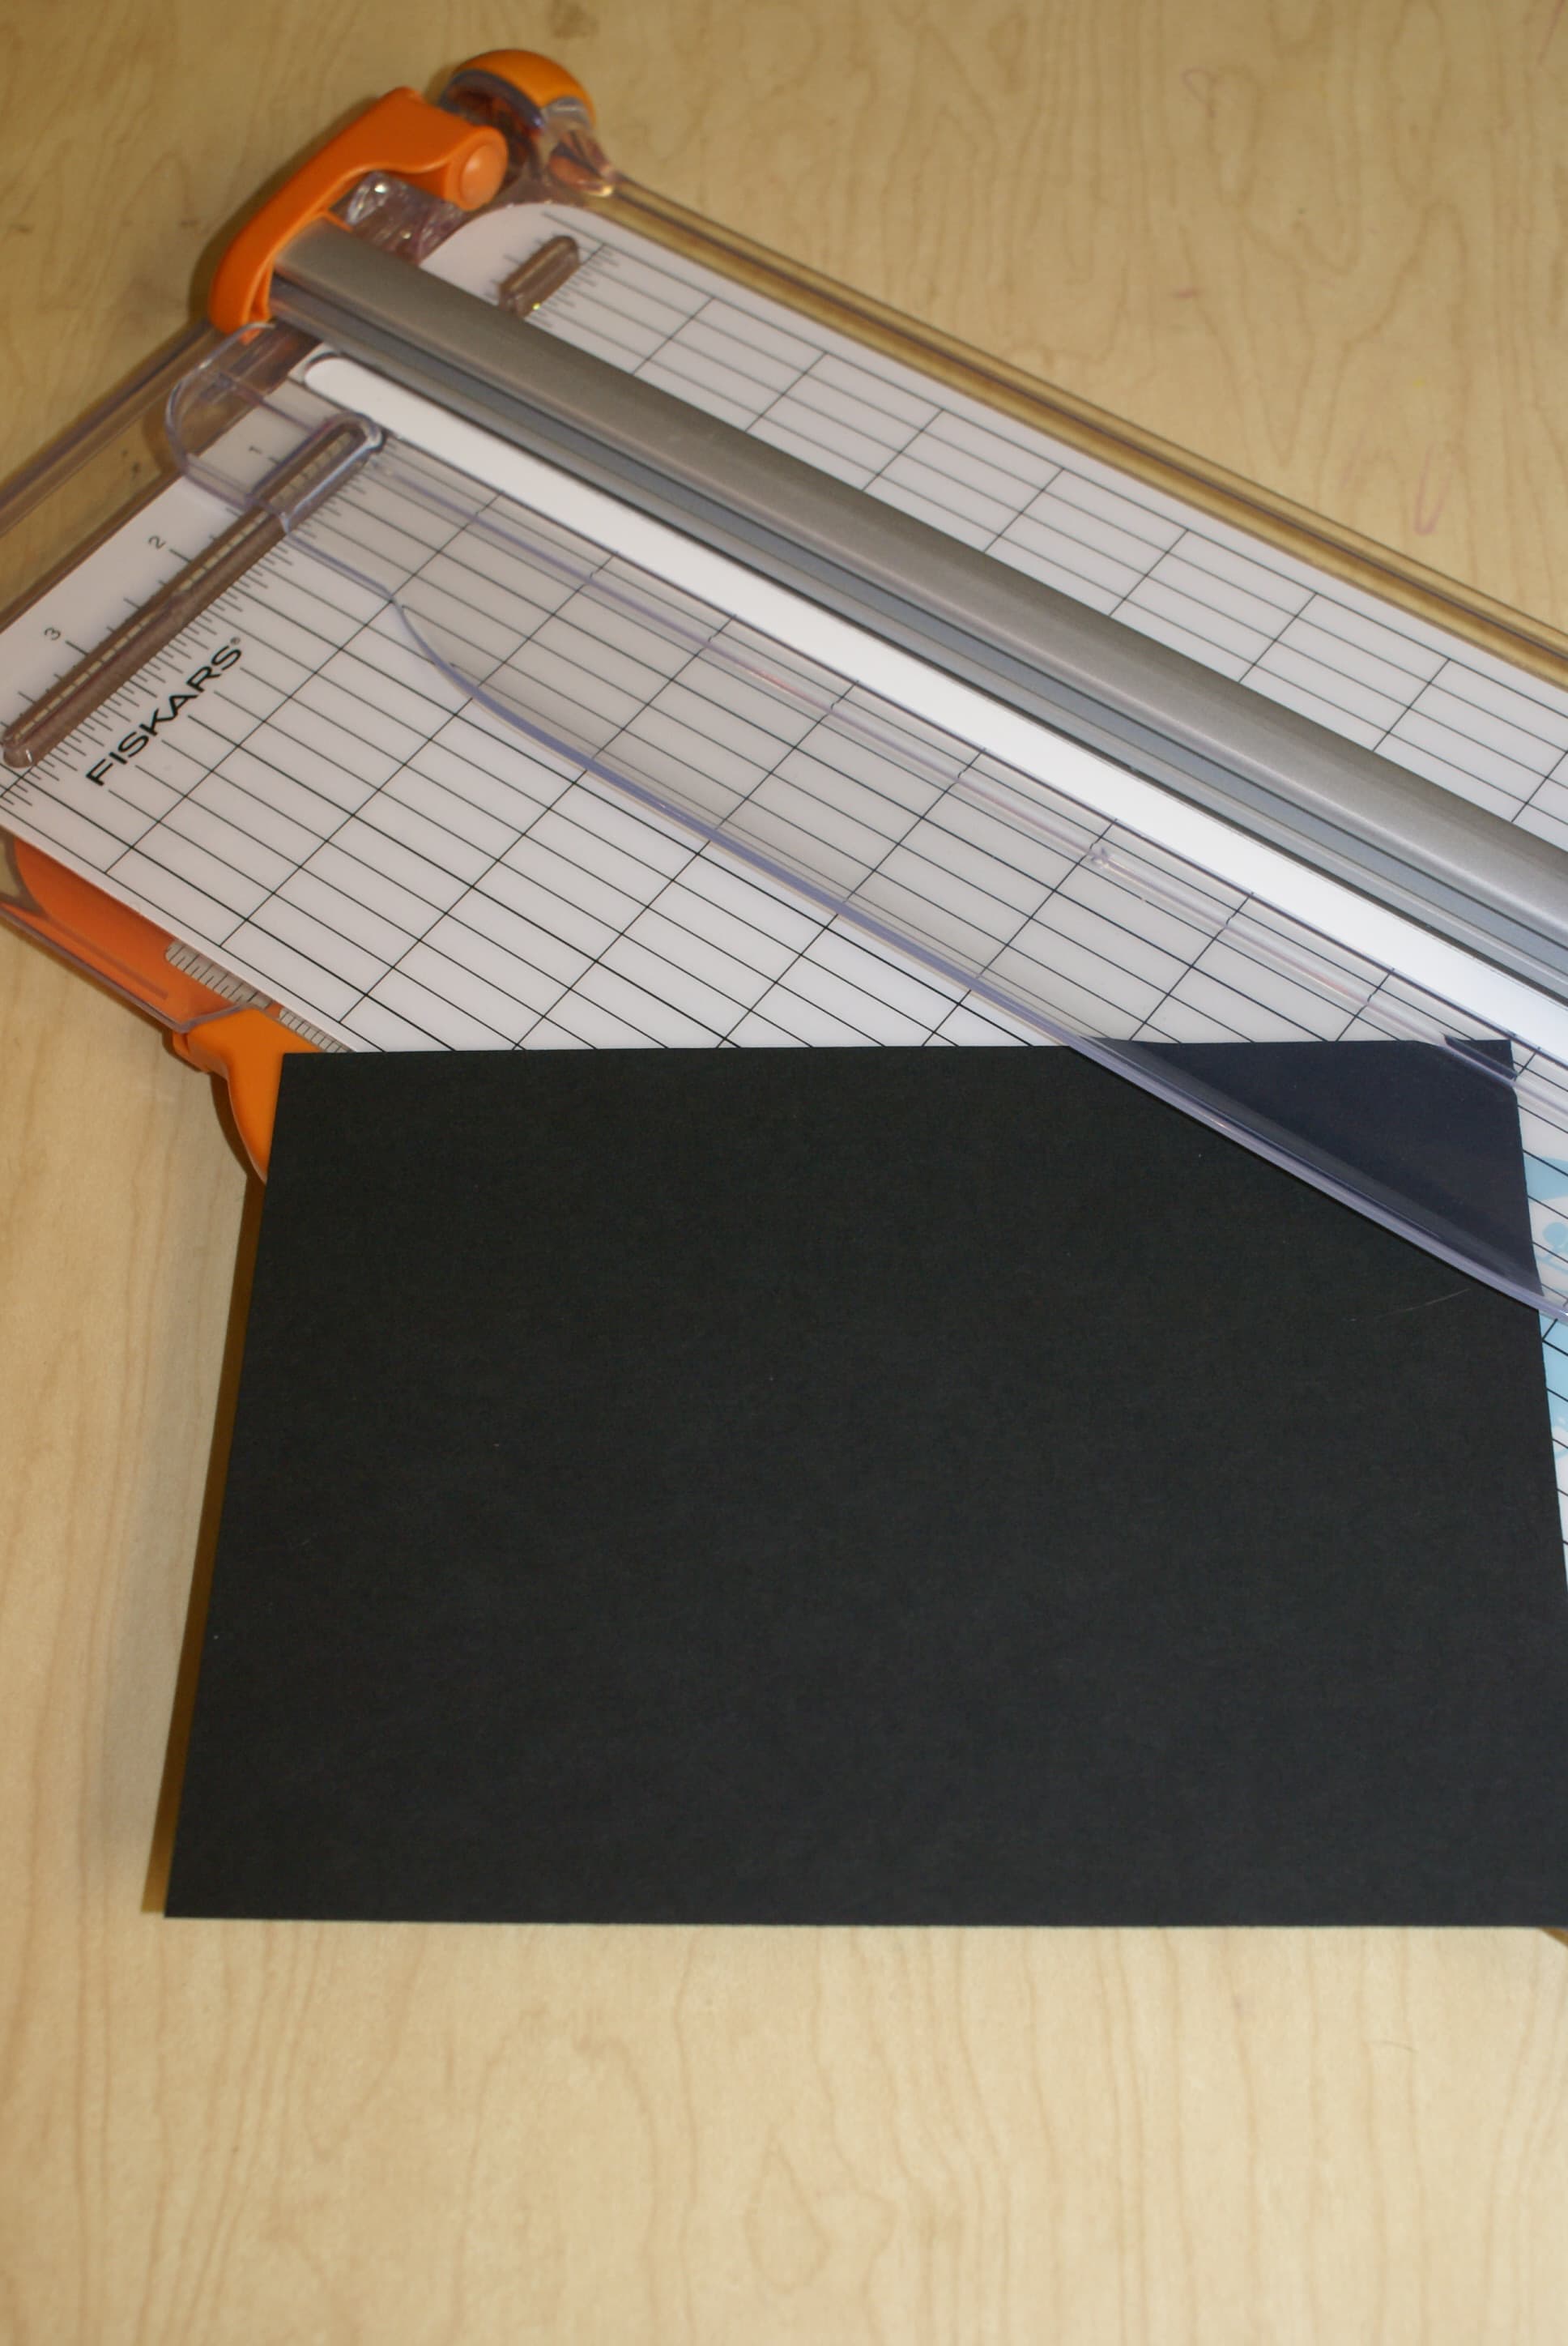
12. Now I just took some black cardstock and cut it down with my Fiskars SureCut LED Rotary Trimmer so that it was a little bit bigger than my photo. I cut it about 8.5 inches by 6.5 inches.

13. I used some decorative edge craft scissors to make a pretty border. You could also use different paper punches.
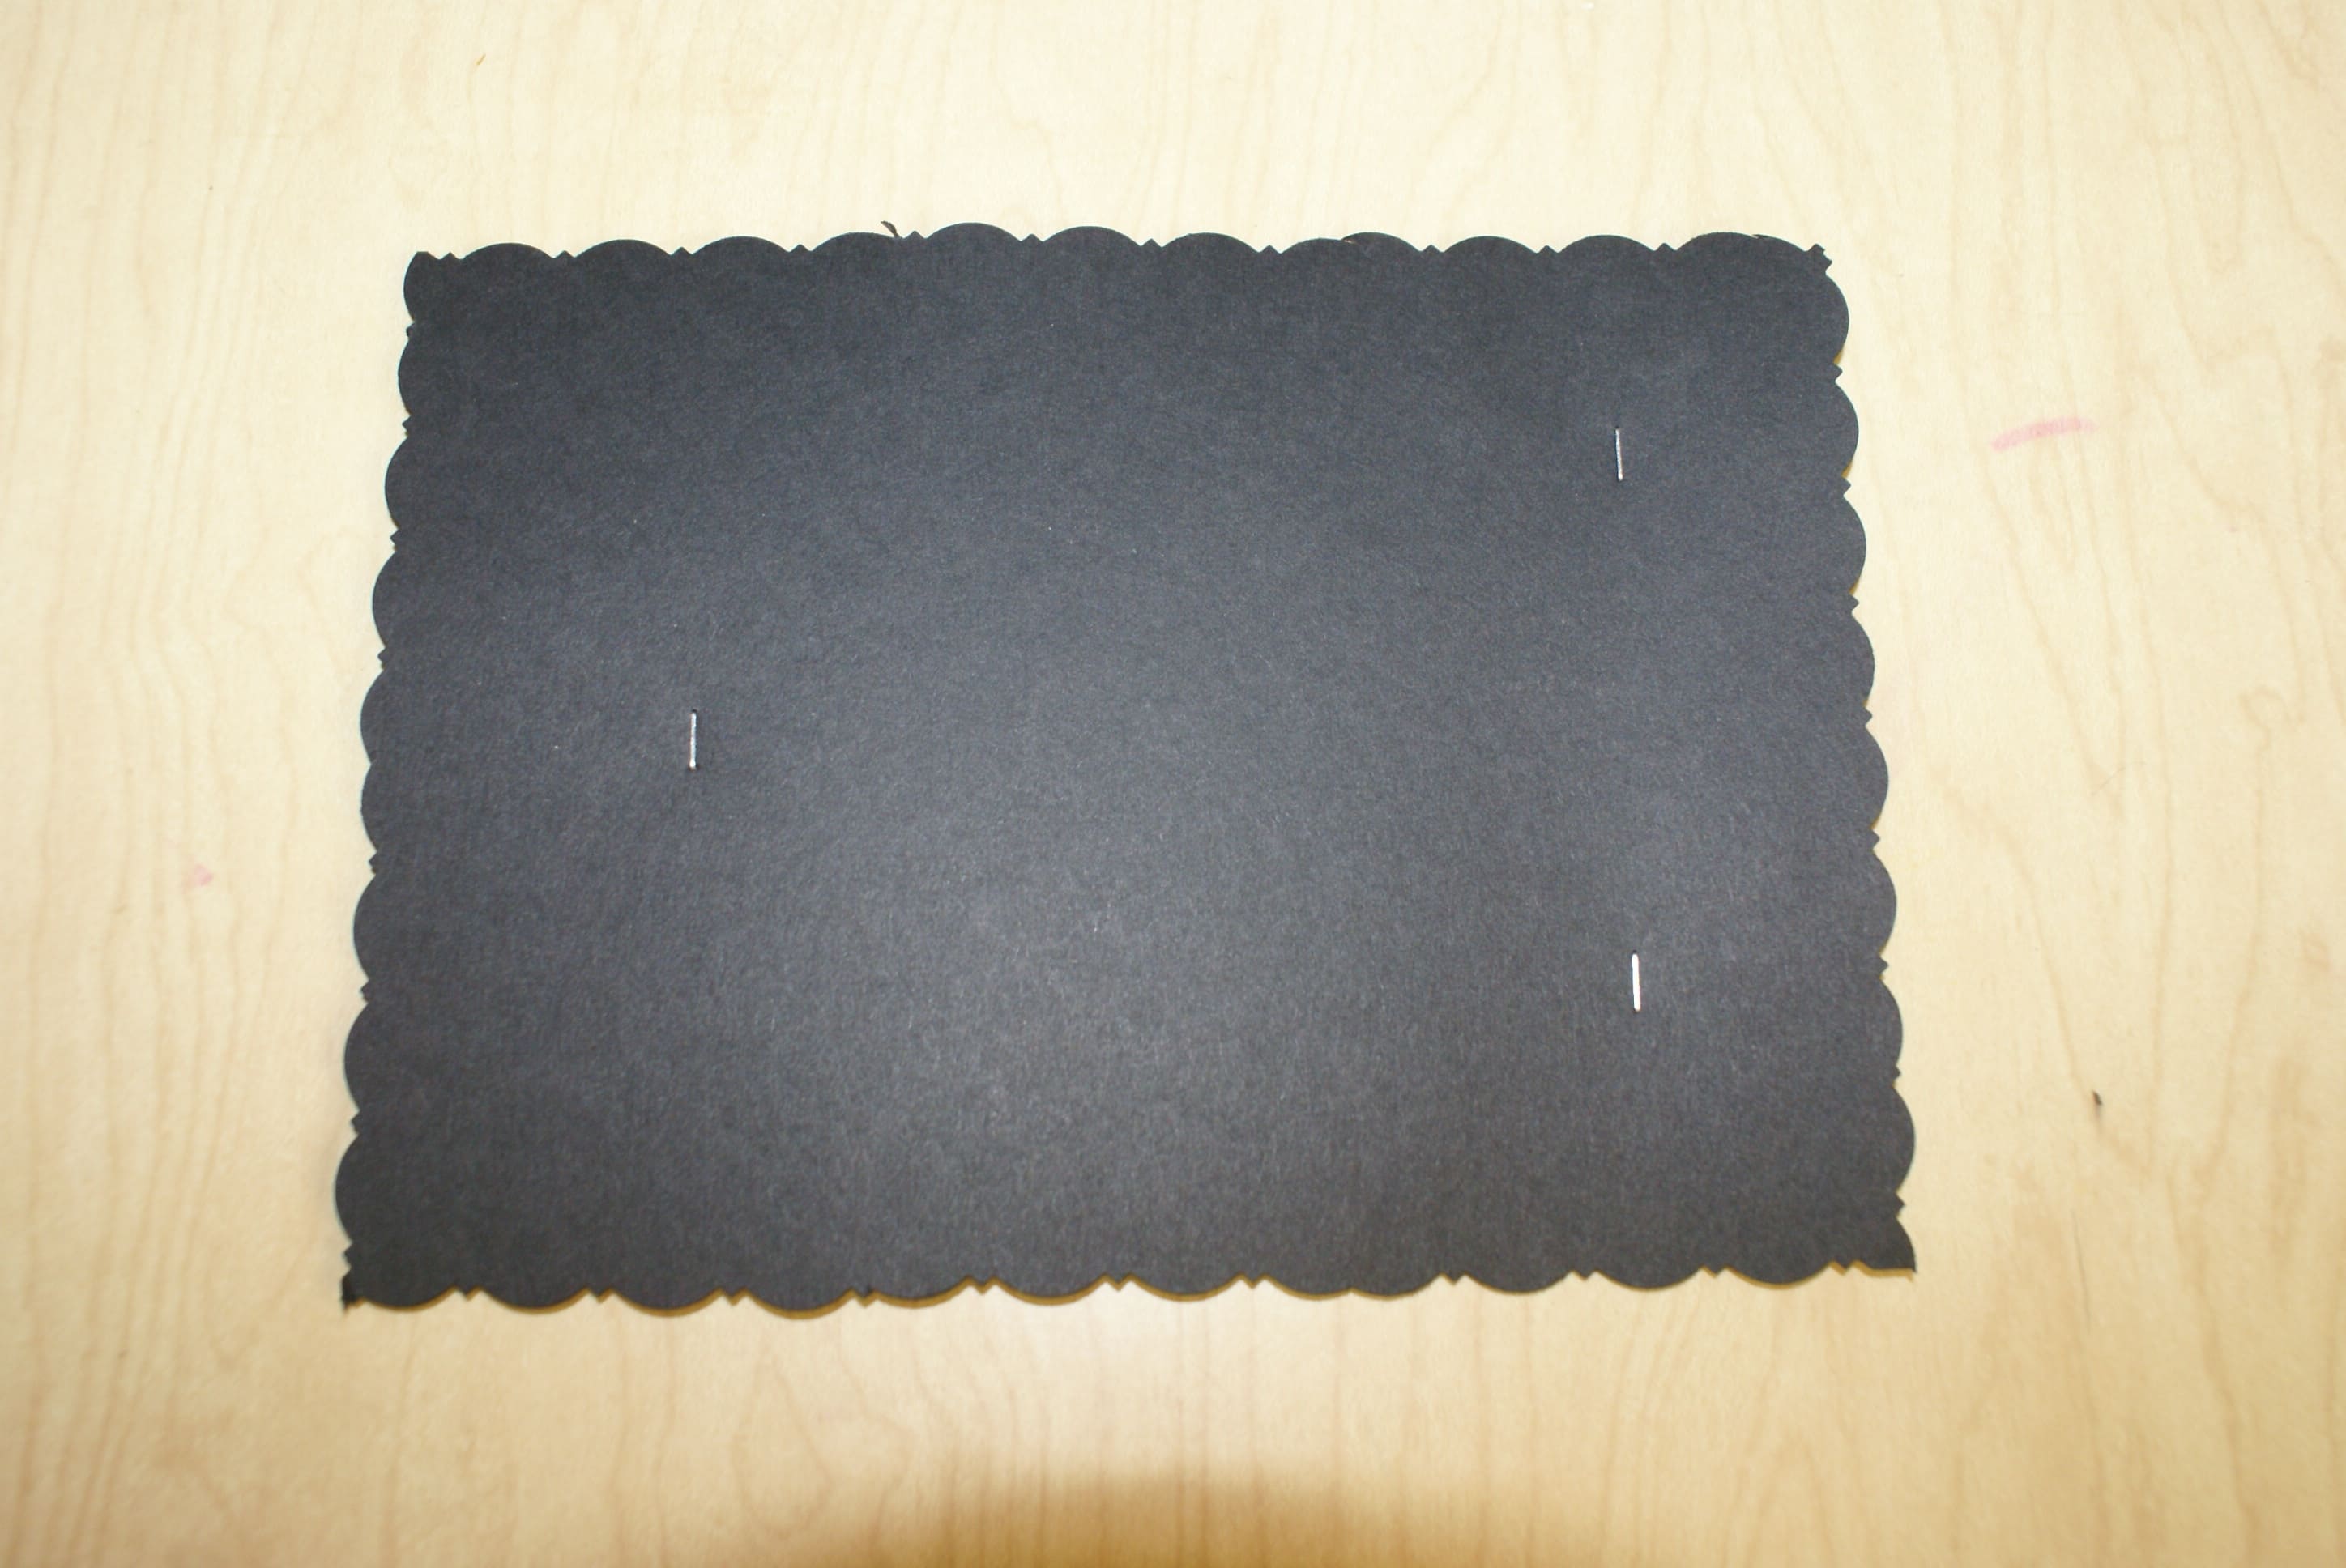
14. Next I attached the Fake Mustache Set to the back of the cardstock with my Tim Holtz Idea-Ology Tiny Attacher Stapler. I made sure to put my staples where I knew the photo would cover them up! On a side note…the Tim Holtz Stapler is so fun for crafting! The staples are very small and you would be shocked at how cute mini staples can be in projects!! 🙂
15. I used some scrapbooking adhesive to adhere the photo to the cardstock and Voila..an adorable and personalized photo valentine!

I hope you enjoyed this Valentine tutorial. Please let me know if you have any questions or if you decide to make this. I would love to see a picture of your finished product!
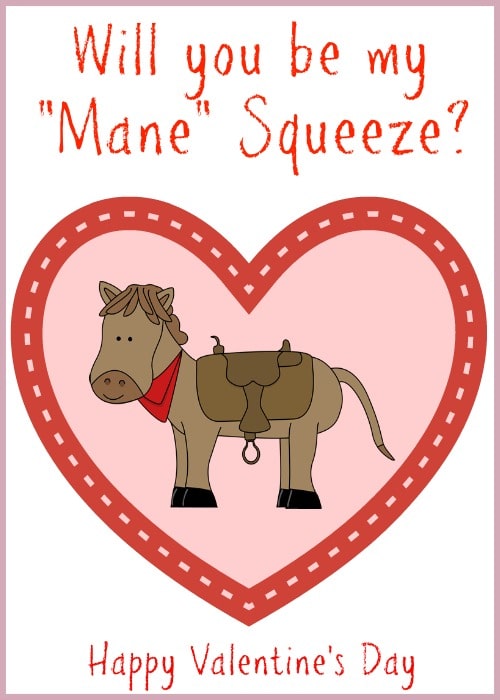
If you want an easier Valentine be sure to check out these free Valentine printables: Will You Be My “Mane” Squeeze and You Float My Boat Valentine


- Super Easy Buffalo Chicken Wraps Recipe (Healthy!) - April 15, 2024
- Air Fryer Asparagus with Parmesan and Garlic - April 8, 2024
- Free Printable Seahorse Coloring Pages for Kids - April 1, 2024
Your little girl is awesome! I love Picmonkey! I’ve had the paid version for a long time and it’s the perfect photo editor for me.
Very cute!
That is such a cute idea!
Such a creative idea! I love this idea and how you made it yourself!
This is soo cute! Thanks for sharing!
This is such a great craft to do with the kiddos. I truly love the personalization of the card which I think makes it more special for the recipient. BTW: PicMonkey rocks!
This is too cute! You did a great job!
Shannon
Clothes & Quotes
Thanks!!
Your daughter is so cute! I use pixelmate all the time.I want to switch to try picmonkey. It looks so easy to work with.. 🙂
Thanks! It is really easy!