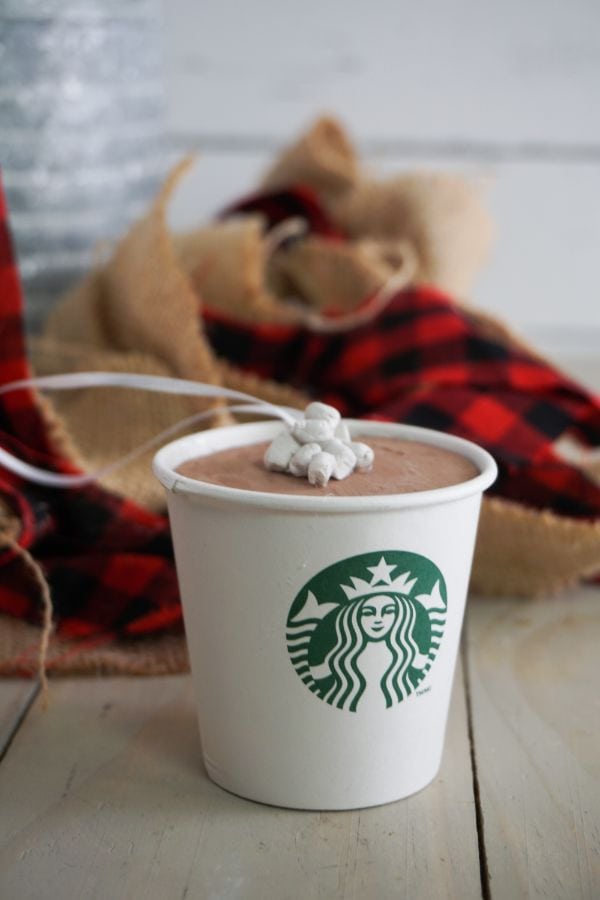
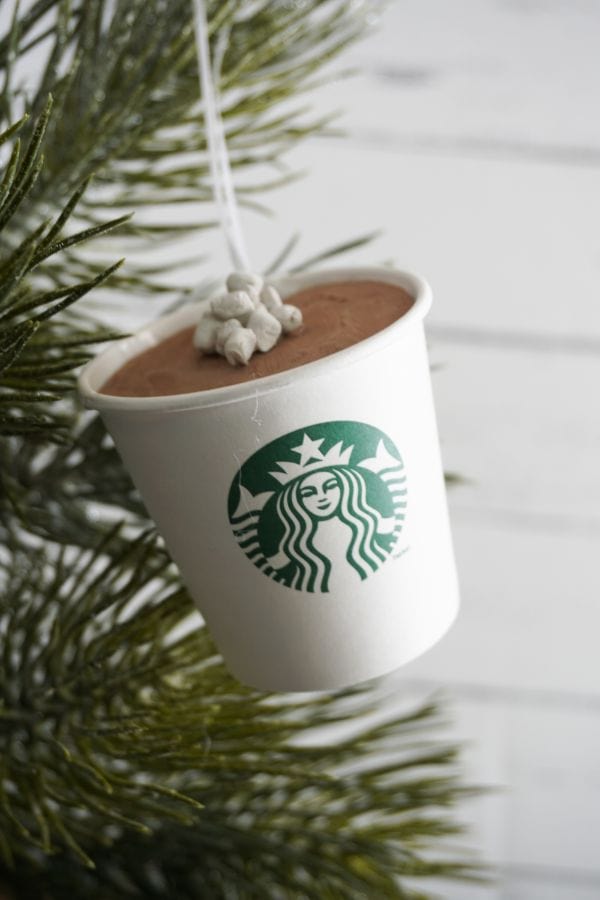
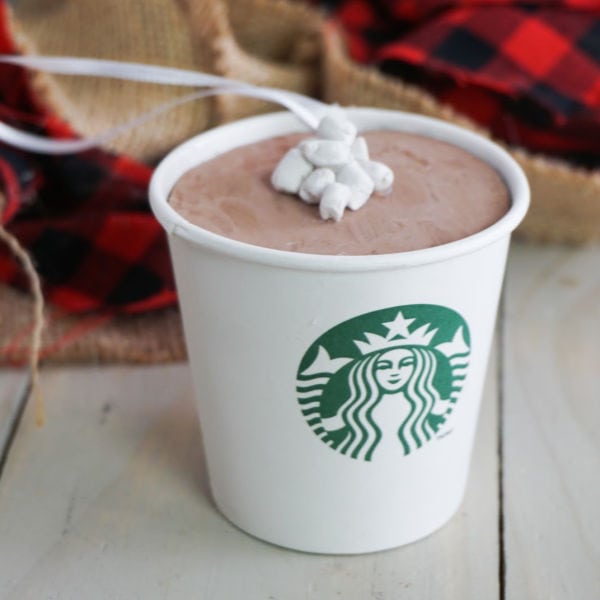
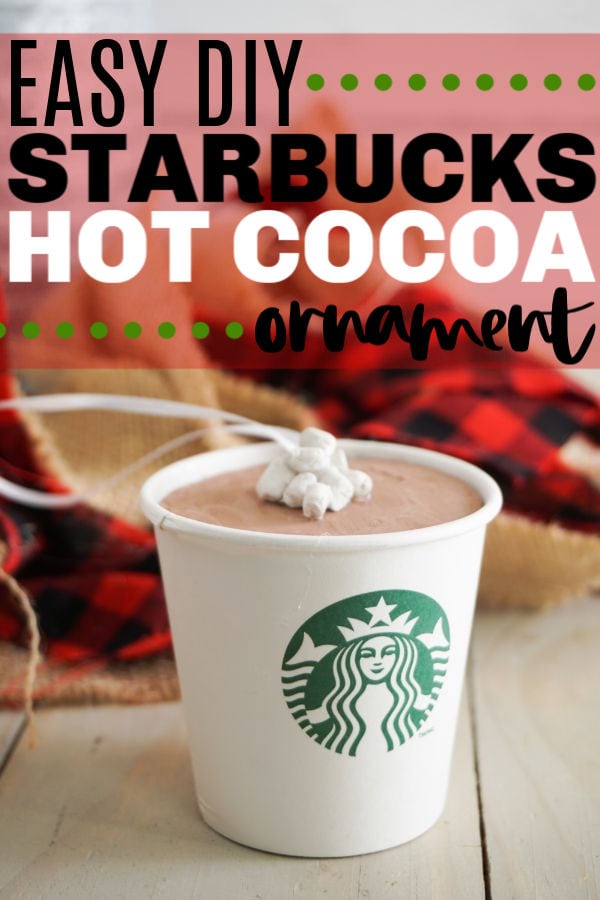
I have the cutest DIY Hot Cocoa Ornament tutorial for you to make! This Starbucks inspired hot cocoa ornament is adorable and will look great on your Christmas tree this year.
WHY MAKE HANDMADE ORNAMENTS?
Some of my favorite ornaments are ones that either I made myself or someone else made and gave me. Homemade ornaments tell a story and that story is fun to think about when you are putting the ornament on the tree each year.
Handmade ornaments like this DIY Starbucks Hot Cocoa Ornament make wonderful gifts for coworkers, family and friends.
Ornaments you make yourself are also great to attach to a gift package for a little something extra!
DIY ornaments are a fun way to get kids involved in crafting and gift-giving too!
SUPPLIES FOR HOT COCOA ORNAMENT
I love that this ornament tutorial only takes 6 items to make. Simple is the way to go when you are making holiday crafts.
- Sample cup from Starbucks (just ask for one at the counter)
- Brown craft paint

- White craft paint
- Air-Dry Clay
- Ribbon or Twine
- Small piece of cardboard


TOOLS NEEDED TO MAKE A HOT COCOA ORNAMENT
This DIY takes a few easy to use tools. If you do any crafting at all you should have these around the house!
- Paintbrush
- Tweezers
- Hot glue gun and a glue stick
- Scissors

HOW TO MAKE A STARBUCKS HOT COCOA ORNAMENT
Easy DIY projects are my favorite. I am not a patient person and don't have time for long-drawn-out crafts! This easy hot cocoa ornament is quick enough that you can make several and give them to your Starbucks loving friends.
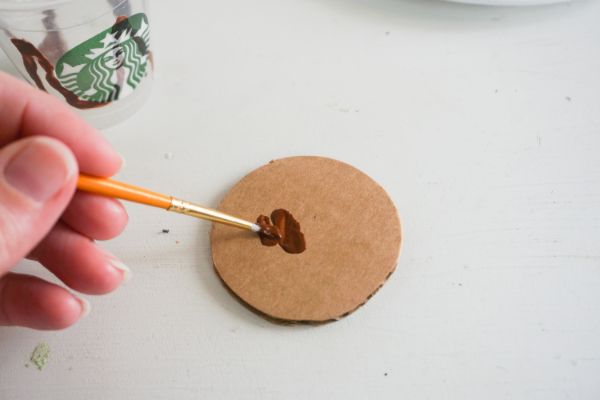
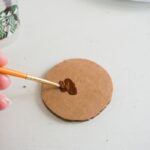
STEP ONE: CUT CARDBOARD
You need to start off by cutting the small piece of cardboard into a circle so it can fit just inside the top of the cup.
Use the top of the cup as a template and cut a circle out of the cardboard with your scissors.
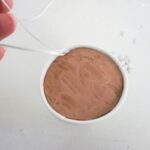
STEP TWO: PAINT CARDBOARD
Now grab your brown and white craft paint and a paintbrush. Mix a little of the brown and a little of the white paint together so that the color resembles hot cocoa. It doesn't take much if you are only doing one ornament.
Paint the top of the cardboard circle with the light brown paint you created.
Let the cardboard dry.
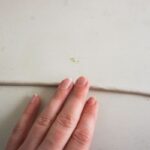
STEP THREE: TRIM CARDBOARD
Now that the cardboard circle is dry trim it down a little so when you put it into the cup it goes down about 1/2 inch.
As you are trimming try to trim on the bottom (unpainted) side of the cardboard. This will help it fit inside the cup better and look nicer.
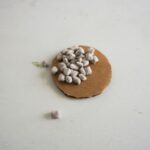
STEP FOUR: MAKE MARSHMALLOWS
Everyone knows that hot cocoa needs marshmallows.
Take the Air-Dry Clay and roll out a small, thin snake with the clay.
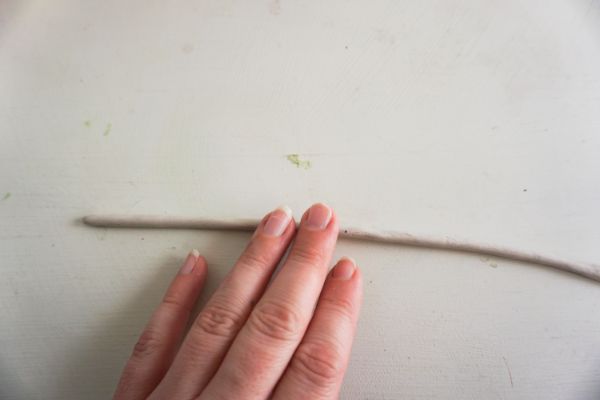
Then cut the snake into small marshmallow-like shapes. Then round the corners so that they look like marshmallows.
Here is the hard part…you need to let these dry for 24 hours.
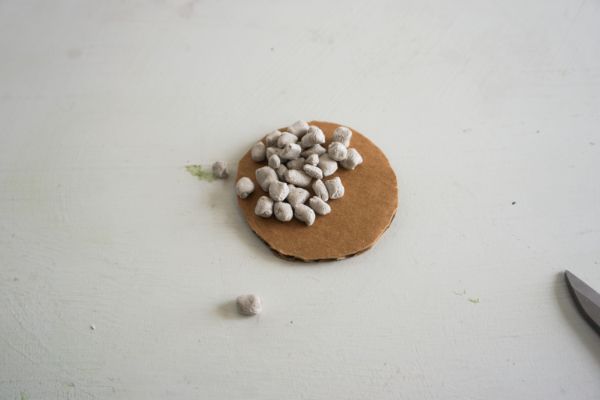
STEP FIVE: PAINT MARSHMALLOWS
Now that it has been 24 hours you can go ahead and paint the marshmallows white.
Let them dry fully.
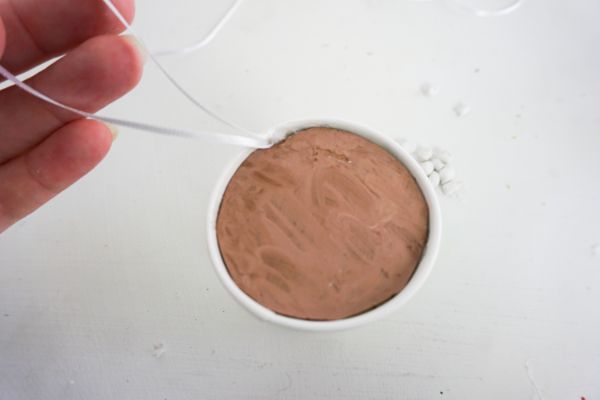
STEP SIX: ADD HANGER
Grab your Christmas ribbon or twine and cute a 3-4 inch piece. Fold it in half and use the hot glue gun to glue it to the inside back of the cup.
This allows your ornament to hang on the tree.
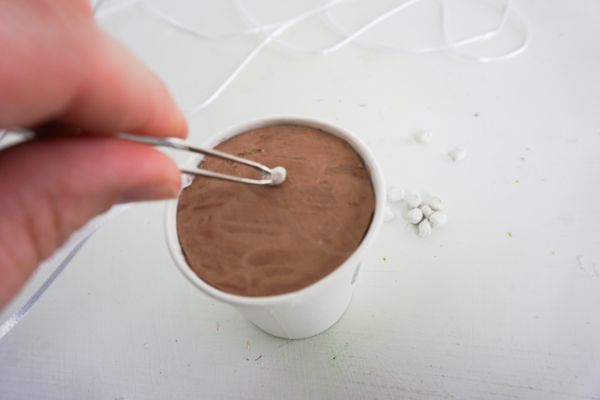
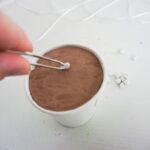
STEP SEVEN: ADD DETAILS
Now it is time to actually glue the cardboard piece into your cup. Add a VERY TINY amount of hot glue to the lower part of the outer portion of the cardboard circle.
Push it down into the cup and hold in place briefly so the glue sets up.
Now use the tweezers to glue each marshmallow on top of the cardboard with the hot glue. It is cute to kind of pile them on top of one another like in a real cup of cocoa.
Remember to be careful with hot glue so you don't get burned (like I have done countless times, LOL)!!
PRINTABLE DIRECTIONS FOR A HOT COCOA ORNAMENT
You can print off the supplies and directions for this hot cocoa ornament via the card below.
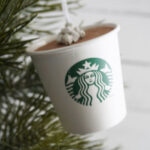
This Starbucks inspired Hot Cocoa Ornament is an easy DIY to make and will look great on your Christmas tree.
- Sample Cup from Starbucks just ask for one at the Starbucks counter
- Brown Craft Paint
- White Craft Paint
- Air-Dry Clay
- 4 inches Twine or Ribbon
- Small Piece of Cardboard
-
Using the top of the cup as a template, cut out a circle from the cardboard. Paint the top of your cardboard circle with a combination of brown and white craft paint to make it look a little like the light brown hot cocoa color. Allow paint to dry fully. Trim the cardboard circle to fit inside your cup about ½ inch deep. Take care to trim the bottom (unpainted side) a bit more than the top side, this will help it fit into the cup better.

-
Roll a small, thin “snake” of clay and cut it to resemble tiny marshmallows.
-
Round over the corners of your marshmallows by hand. Allow clay to dry for at least 24 hours. Paint the clay marshmallows with white paint. Allow paint to dry fully.
-
Cut a 3-4 inch length of twine or ribbon and make a loop, then hot glue this in place on the back side of the cup.
-
Push the cardboard circle into the top of the cup. Hot glue this in place with the tiniest amount of hot glue, if possible.
-
Using tweezers, hot glue the marshmallows on top of the cardboard.

If you loved this homemade hot cocoa ornament be sure to check these other ornament tutorials out:
Be sure to PIN this for later!

- 7 Facts About Liposuction Every Patient Should Know - June 23, 2026
- What to Expect From a Moxi Laser Treatment — Before, During, and After - June 22, 2026
- Facial Rejuvenation: When Does Plastic Surgery Become the Best Choice? - June 22, 2026


