Easter is a time of year that really makes me reminensce about the past and the pastel colors are perfect for vintage decor. This Vintage Easter Wood Plaque Craft reminds me so much of the wonderful time that I spent with my grandmother when I was growing up. She loved all things with flowers and birds…from her rose covered sugar bowl to the doilies adorning her end tables. This is the perfect DIY for Easter and a great way to preserve vintage cards!

Vintage Easter Wood Plaque Craft
My grandmother saved EVERYTHING. When she passed away, we found vintage greeting cards tucked in drawers, and an anniversary card from the late 1950’s inside a teapot. She had even saved a few cards from the early 1970’s that my Mom had lovingly bought for us to give her for her birthday. Greeting cards from that era are different than the glossy cards that we send today. They featured adorable chubby cheeked kids and whimsical animals in soft colors.
They say that if you wait long enough, old trends will come back in style. That is certainly true for vintage prints. I used beautiful vintage clip art to make an Easter decoration for my shelf. These wonderful graphics can be printed and framed or decoupaged like I did in this project.
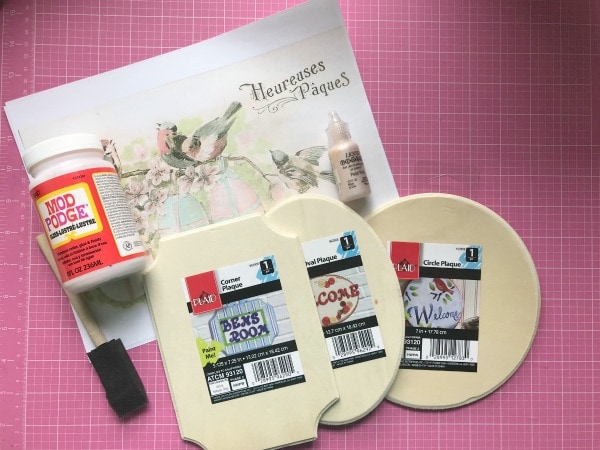
Supplies Needed for Vintage Easter Wood Plaque


How to Make a Vintage Easter Plaque
First sand the wooden plaque so there aren’t any rough edges. I couldn’t get off all of the residue from the label, so I sanded that too.
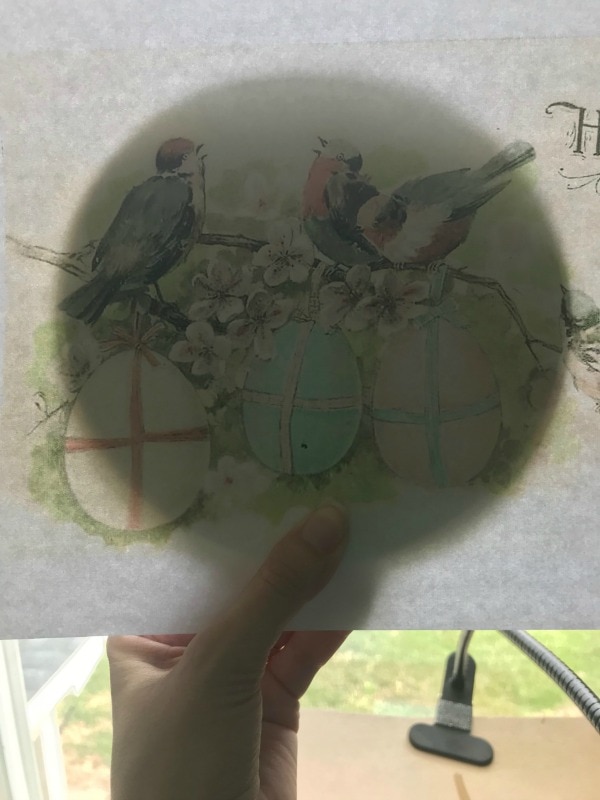
Print your clip art on regular copy paper. Since I knew that part of my clip art would be cut off, I held the plaque up to the light with the clip art behind it. This helped me to see how I wanted to position the clip art.
Trace around the plaque onto your clip art. It’s okay to trace onto the front of it.
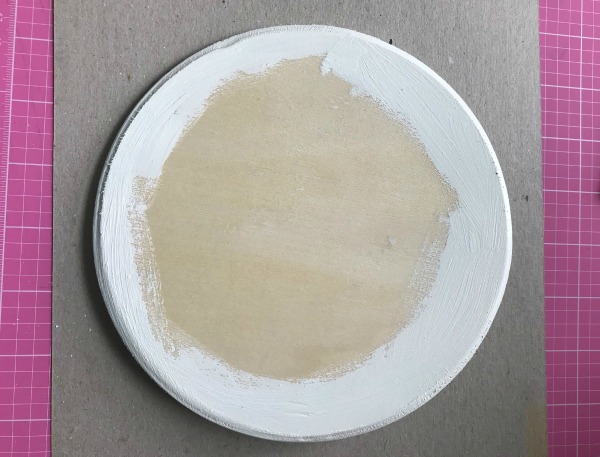
Paint the end of the plaque with a pale color of acrylic paint that matches your Clip Art.
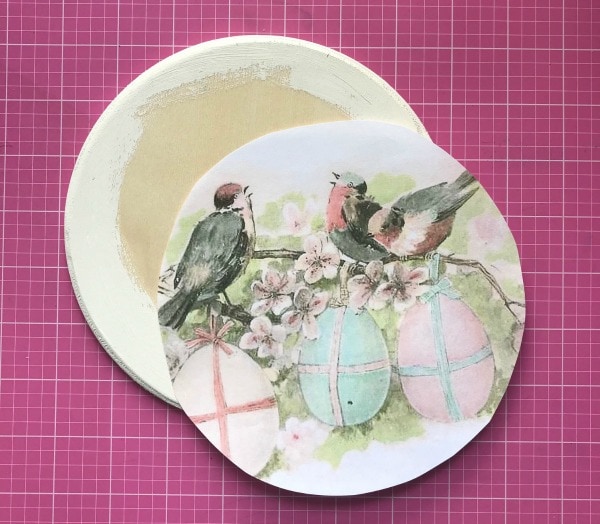
Cut out the clip art on the inside of the line you traced. My plaque had a small ridge, so I cut in about 1/8”. Lay your clip art onto the front of your plaque. Trim any spots that are uneven.
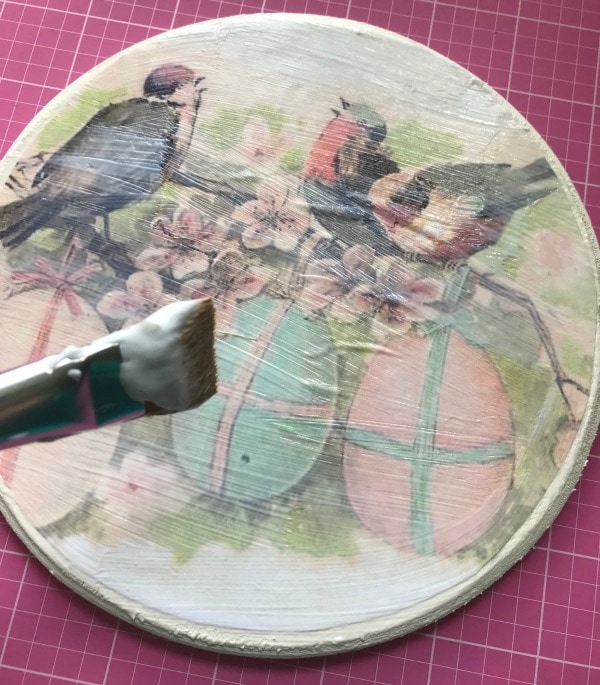
Cover the front of the plaque with a thin coat of Mod Podge, and lay the clip art on top of it. Mod Podge dries fast, so you’ll want to work quickly. Smooth out any bubbles or wrinkles.
Add a coat of Mod Podge to the top of the clip art to give it a nice finish.
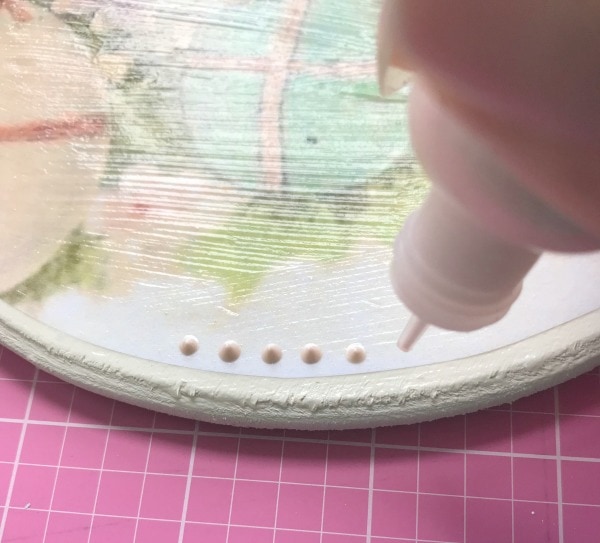
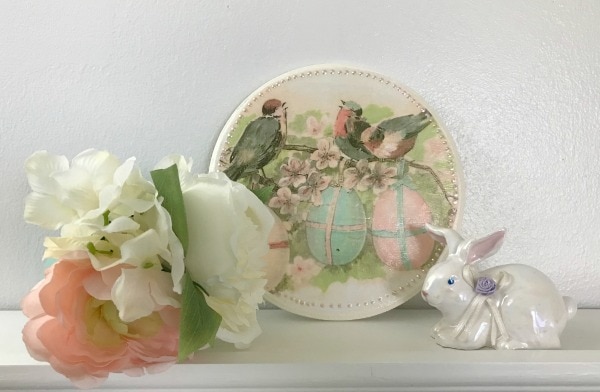
I love how this Vintage Easter plaque looked just like it was, but I had a bottle of pale pink Perfect Pearls that matched. I added dots around the outside to give it a little dimension. You could also use pearl adhesive rhinestones .
.
Such a Great Addition To Your Easter Decor
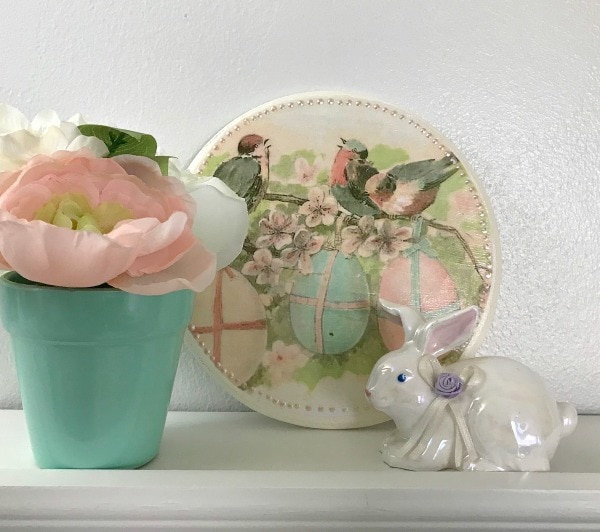
This Vintage Easter Wood Plaque Craft turned out so good and is a great addition to my Easter Decor. It looks adorable on the mantel or a shelf. It will look great next to one of my other easy Easter crafts.
How do you decorate for Easter?

- Vintage Easter Wood Plaque Craft - March 26, 2018
- DIY Kids Painted Flower Pot - March 7, 2018
- DIY Valentine's Sharpie Mug - January 15, 2018